Canning Green Beans the Old-Fashioned Way
Canning green beans the old-fashioned way is the perfect method to preserve home-grown green beans without any added preservatives.
Equipment
- Pressure canner
- Quart-sized canning jars with lids and bands
- Large stock pot
- Small pot
- Ladle
- Jar lifter
- Tongs or magnetic lid lifter
- Canning funnel
- Paper towels
- Kitchen towels
- Timer
- Hot pads
- cooling rack
Ingredients
Instructions
- Prep and wash: Break the tips off the green beans and break them into one to two-inch pieces, or your preferred size. Wash the beans in a clean and sterilized sink twice by filling the sink with the beans and cold water, then place them in a strainer.
- Sterilize the jars: Jars can be sterilized in a number of ways. I place my jars and rings in the dishwasher and run them through the sterilizing cycle. I pull the jars out of the dishwasher when the cycle is complete and the jars are still hot. Another method is to submerge the canning jars into a large pot of water and bring it to a gentle simmer for 10 minutes to sterilize them. Keep the jars in the hot water until ready to pack and fill them.
- Prepare the brine: In a large stock pot, bring water to a boil over high heat. Once it boils, reduce to medium heat and keep the water hot until you’re ready to use.
- Prepare lids: In a small pot, bring water to a low simmer and place canning lids in the pot to sterilize. Keep the lids hot until ready to use. Note: Always use new lids so the jars will seal properly.
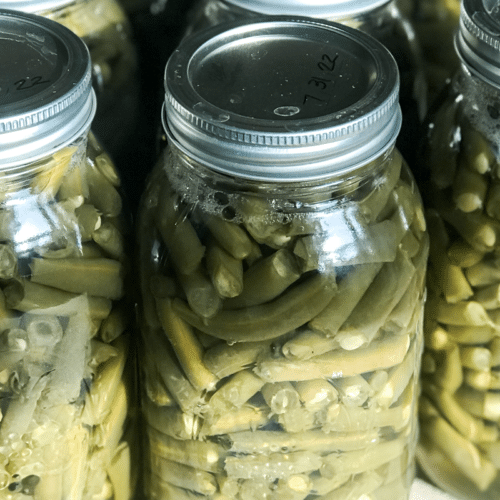
- Pack the jars: Carefully remove a sterilized jar from the simmering water using the jar lifter. Pack the jar tightly with green beans, pressing down on the beans in the jar to pack them full. This is called the raw pack method. Once the beans are packed in the jar, leave about an inch of space from the rim to the top of the beans—this is called headspace. Repeat this process with the other jars and beans.
- Add canning salt and water: Put 1 teaspoon of canning salt on top of the beans in each jar. Only use canning salt. If you use pint jars, only use ½ teaspoon of canning salt. Then, using a ladle and canning funnel on top of the jar, add boiling water. Make certain the beans are fully covered while maintaining an inch of headspace.
- Remove air bubbles: Gently tap the jars on the palm of your hand to release any air bubbles trapped within the beans. You can also gently run a bubble popper around the inside of the jar helping to release any trapped air.
- Seal the jars: Using a clean damp cloth or paper towel, wipe the rim of each jar to remove any residue. This will help ensure your lids will seal properly. Using tongs or a magnetic lid lifter, use lids that are in simmering water and place on top of each jar. Using a cloth to hold the jar (because it will be hot), screw the metal band on until it is fingertip-tight. Avoid overtightening the rings.
- Process the jars: Place a trivet on the bottom of your pressure canner, and using the jar lifter place the jars in the pot. The pot should have about 2 inches of water in the bottom. Following the instructions of your pressure canner, pressure can your jars at 15 pounds pressure for 25 minutes for quart jars and 20 minutes for pint jars. Pounds of pressure and processing time can vary for higher altitudes. The National Center for Food Preservation has some helpful resources for pressure canning guidelines, including how to find your altitude.
- After the jars have been processed: After the jars have been processed, turn off the heat and allow the pressure canner to completely depressurize undisturbed. Next, carefully remove the lid of the pressure canner using hot pads, because the steam will still be extremely hot. Remove the hot jars using jar tongs and place them on a cooling rack. Let sit undisturbed for 12-24 hours and listen for the lids to pop.
- Check seals: After the jars have cooled for 12–24 hours, press down on the center of the lids ensuring they don’t flex up and down. Any unsealed jars should be refrigerated and consumed within a few weeks.
- Store and enjoy: Label your sealed jars with the date and store them in a cool, dark place. Allow them to sit for a few weeks before opening them.