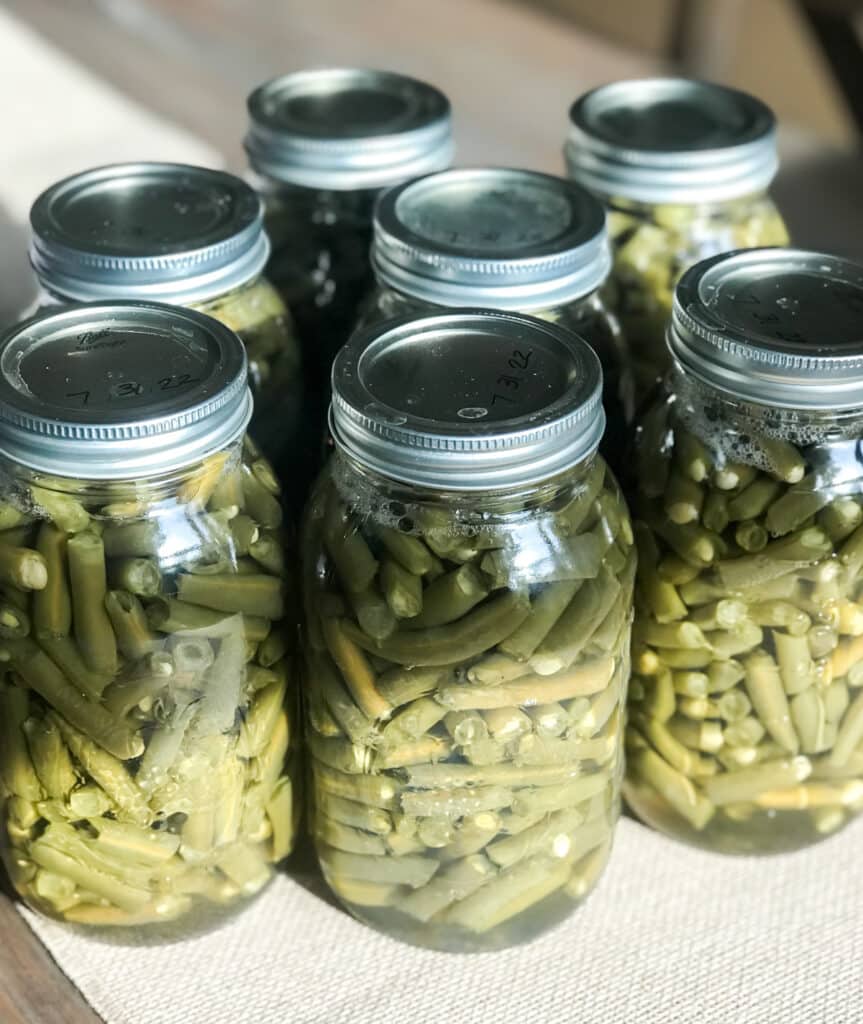
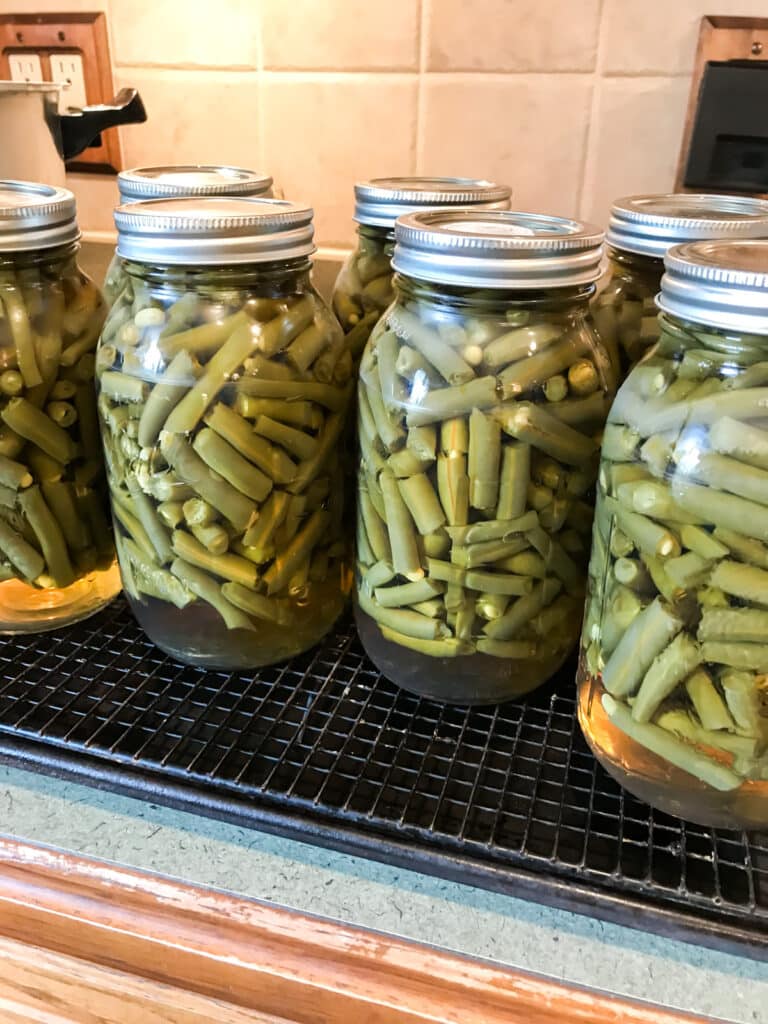
Canning green beans the old-fashioned way is the perfect method to preserve home-grown green beans without any of the added preservatives you find in store-bought vegetables. This easy step-by-step guide on how to pressure can fresh summer green beans will have your pantry stocked for you and your family to enjoy all year long.
This post may contain affiliate links. Please read my disclosure policy for more information.
How I Learned to Can
Last year, I learned the skill of canning. As I was growing up, my mom and my paternal grandma were avid canners. My husband’s mom has always been an avid canner as well. I never learned how, because the idea of using a pressure cooker intimidated me.
However, last summer, we had several friends share their garden hauls with us. We had so much fresh produce, we couldn’t eat it all before it went bad. Then, adding in the high cost of groceries, I decided to learn the skill of home food preservation. As it turns out, it was not that difficult.
I called my mother-in-law throughout the summer, and she walked me through the steps of canning. By the end of summer, some of the delicious canned goods I had were green beans, tomatoes, salsa, pickles, peaches, and jalapeno jelly. Today, I want to share how to can green beans the old-fashioned way, because it’s so much easier than you would think.
The Charm of Old-Fashioned Canning
In a world with so many modern conveniences, thinking of preserving your own food could sound like a lot of work. However, when you take the time to preserve your own foods, you have a huge sense of accomplishment and satisfaction knowing you played a role in preserving what you eat. Also, you get to pay homage to the generations before us, including my grandma and my husband’s grandma, who didn’t have a choice and had to can their own food.
If you are just learning how to preserve food, Canning Green Beans the Old-Fashioned way is a really easy way to get started. My Grandma’s Old-Fashioned Zucchini Canning Recipe is also a great recipe for a beginner.
Pressure Canner vs. Water Bath Canner
For the most part, there are two main methods for preserving food: pressure canning and water bath canning. The determination is made regarding which method of canning is appropriate according to the acidity level of the food you are preserving. Additionally, if canning is not done correctly, there is an increased risk of foodborne botulism, which can be deadly.
According to the South Dakota State University Extension Office, “If you are canning a high-acid food, you will use the water bath canning method. If you are canning a low-acid food, you will use the pressure canning method. Acidity may be natural, as in most fruits, or added, as in pickled food. While low-acid canned foods contain too little acid to prevent the growth of C. botulinum, high-acid foods contain enough acid to block its growth or destroy them more rapidly when heated.”
The South Dakota Agricultural Heritage Museum blog has a wealth of knowledge about the history of the pressure canner. Their site goes in depth, beginning with the invention of the first pressure cooker in 1679. They further explain that in 1905, National Presto Industries began creating pressure canners in the United States, and “In 1917, the U.S. Department of Agriculture determined that pressure canning was the only safe way to can low acid foods.”
Green beans are considered a low-acid food, which requires a pressure canner.
Ingredients
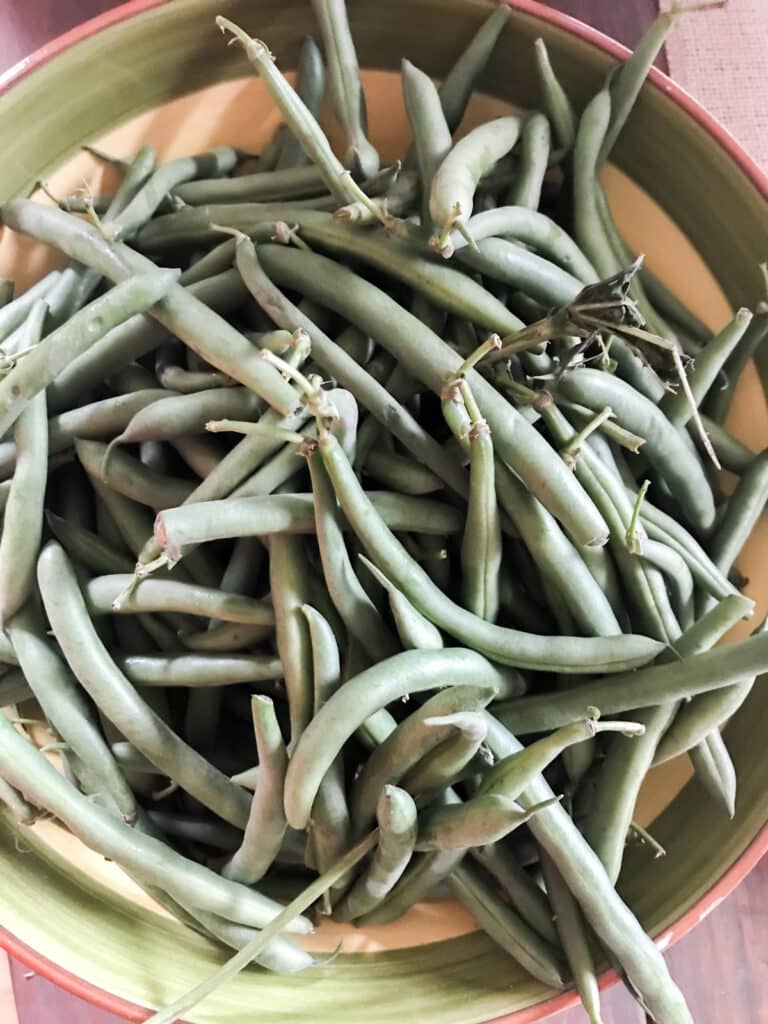
- Fresh Green Beans
- Canning salt (not table salt and not sea salt)
- Water
Equipment
- Pressure canner
- Quart-sized canning jars with lids and bands
- Large stock pot
- Small pot
- Ladle
- Jar lifter
- Tongs or magnetic lid lifter
- Canning funnel
- Paper towels
- Kitchen towels
- Timer
- Hot pads
- Cooling rack
Step-by-Step Guide to Canning Green Beans the Old-Fashioned Way:
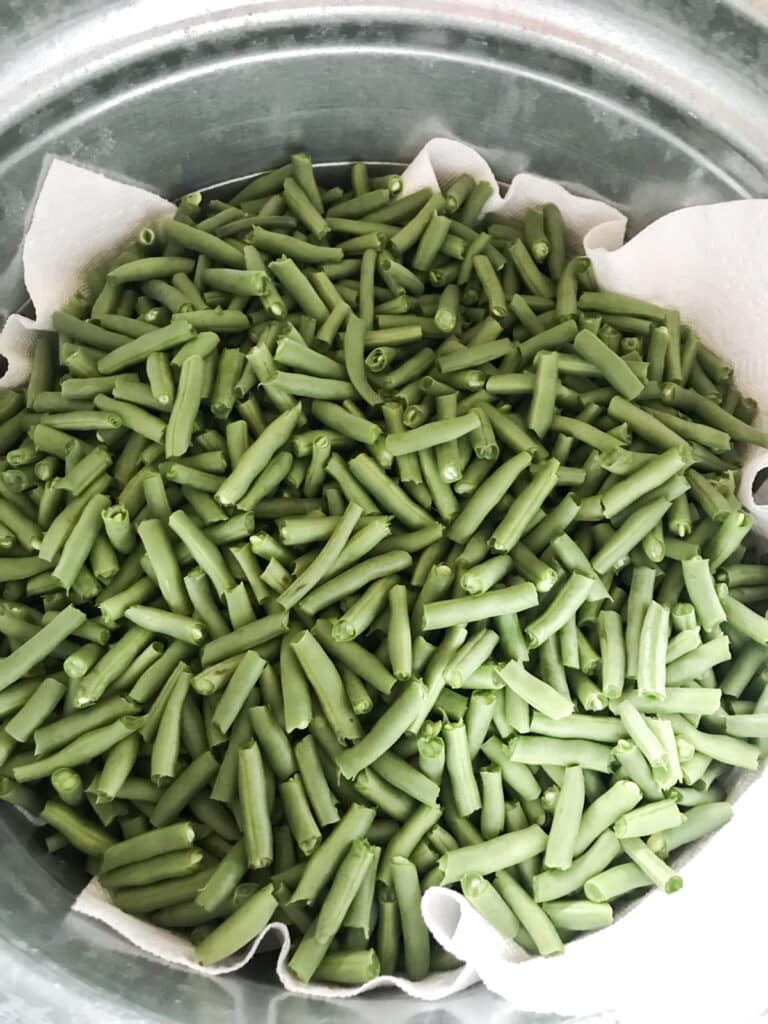
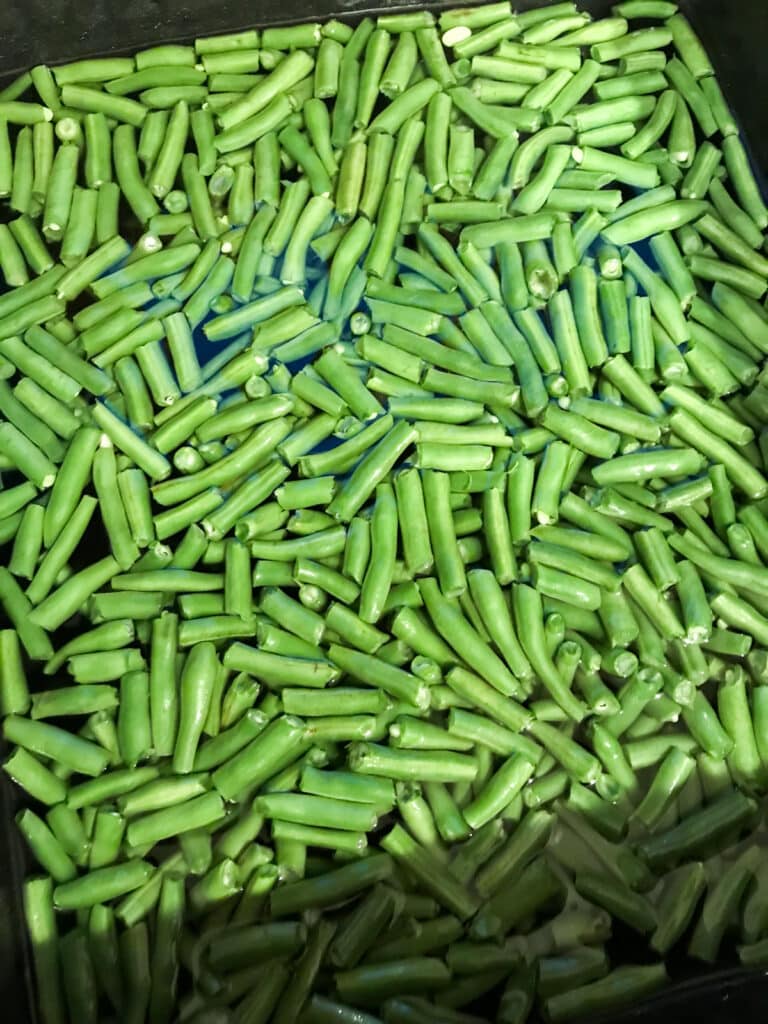
Prep and wash: Break the tips off the green beans and break them into one to two-inch pieces, or your preferred size. Wash the beans in a clean and sterilized sink twice by filling the sink with the beans and cold water, then place them in a strainer.
Sterilize the jars: Jars can be sterilized in several ways, but I like to place my jars and rings in the dishwasher and run them through the sterilizing cycle. I pull the jars out of the dishwasher when the cycle is complete, and the jars are still hot. Another method is to submerge the canning jars in a large pot of water and bring it to a gentle simmer for 10 minutes to sterilize them. Keep the jars in the hot water until they are ready to pack and fill.
Prepare the brine: In a large stock pot, bring water to a boil over high heat. Once it boils, reduce to medium heat and keep the water hot until you’re ready to use.
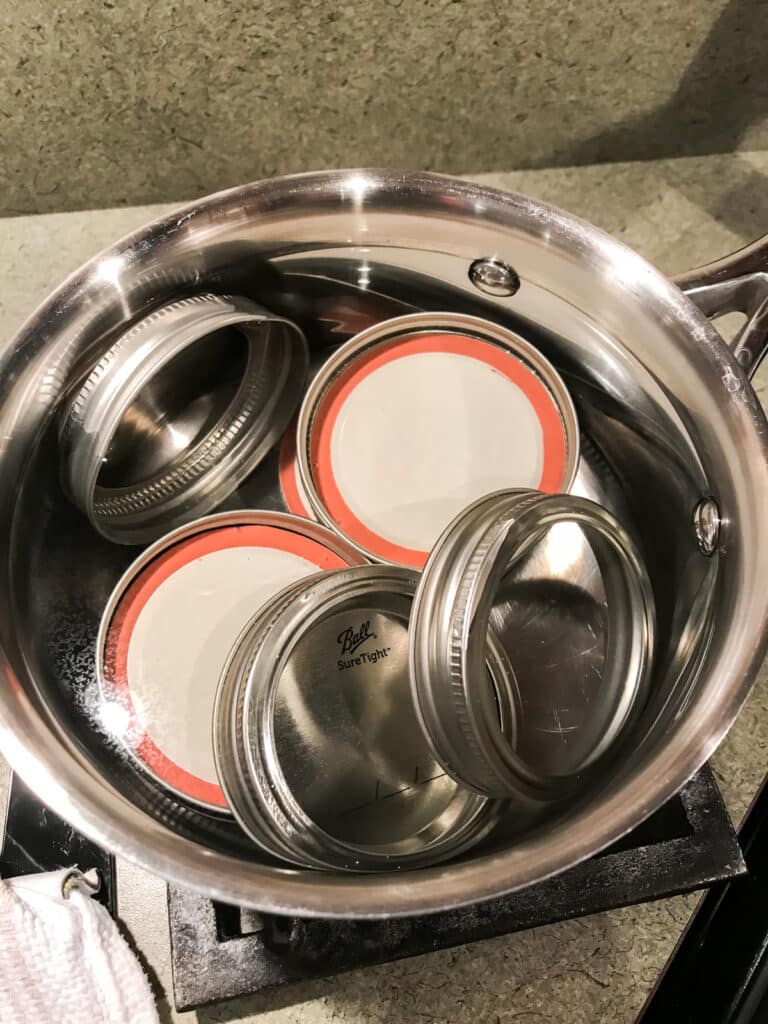
Prepare lids: In a small pot, bring water to a low simmer and place canning lids in the pot to sterilize. Keep the lids hot until ready to use. Always use new lids so the jars will seal properly.
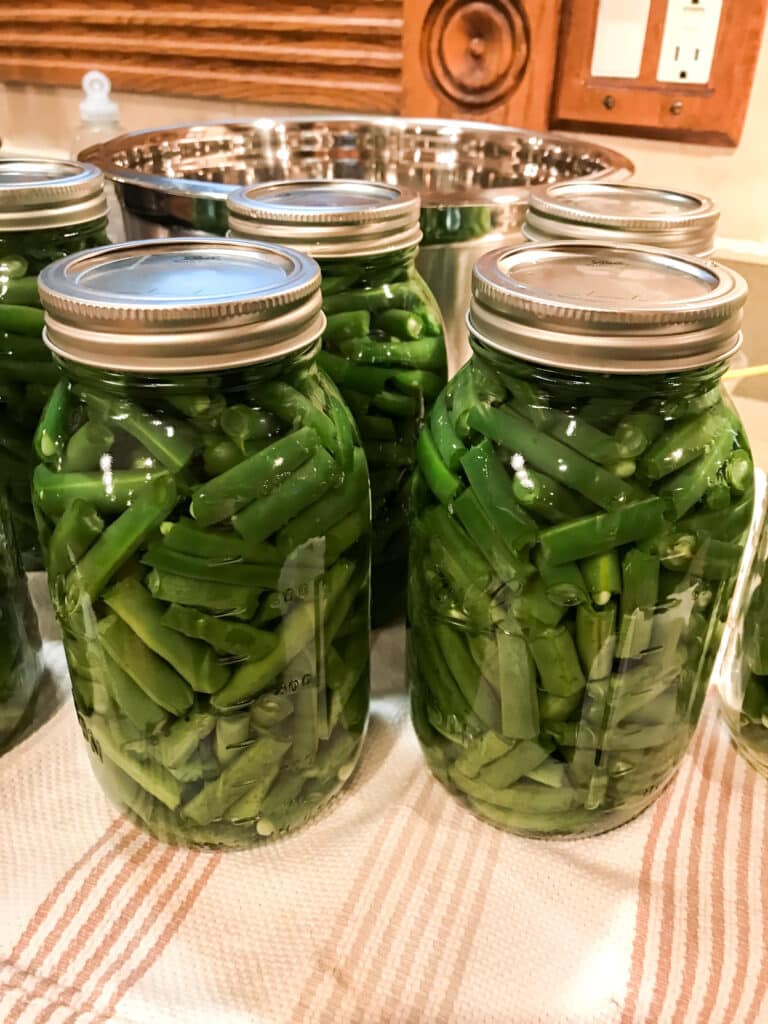
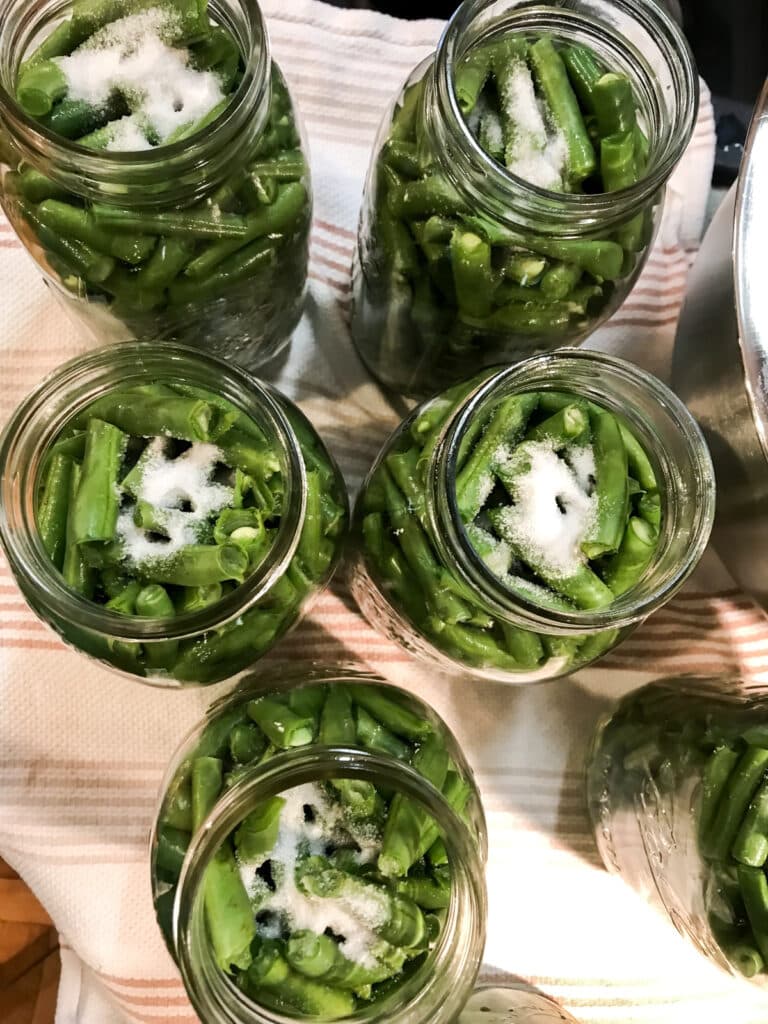
Pack the jars: Carefully remove a sterilized jar from the simmering water using the jar lifter. Pack the jar tightly with green beans, pressing down on the beans in the jar to pack them full. This is called the raw pack method. Once the beans are packed in the jar, leave about an inch of space from the rim to the top of the beans—this is called headspace. Repeat this process with the other jars and beans.
Add canning salt and water: Put 1 teaspoon of canning salt on top of the beans in each jar. Only use canning salt. If you use pint jars, only use ½ teaspoon of canning salt. Then, using a ladle and canning funnel on top of the jar, add boiling water. Make certain the beans are fully covered while maintaining an inch of headspace.
Remove air bubbles: Gently tap the jars on the palm of your hand to release any air bubbles trapped within the beans. You can also gently run a bubble popper around the inside of the jar, helping to release any trapped air.
Seal the jars: Using a clean, damp cloth or paper towel, wipe the rim of each jar to remove any residue. This will help ensure your lids will seal properly. Using tongs or a magnetic lid lifter, use the lids that are in simmering water and place them on top of each jar. Using a cloth to hold the jar (because it will be hot), screw the metal band on until it is fingertip-tight. Avoid overtightening the rings.
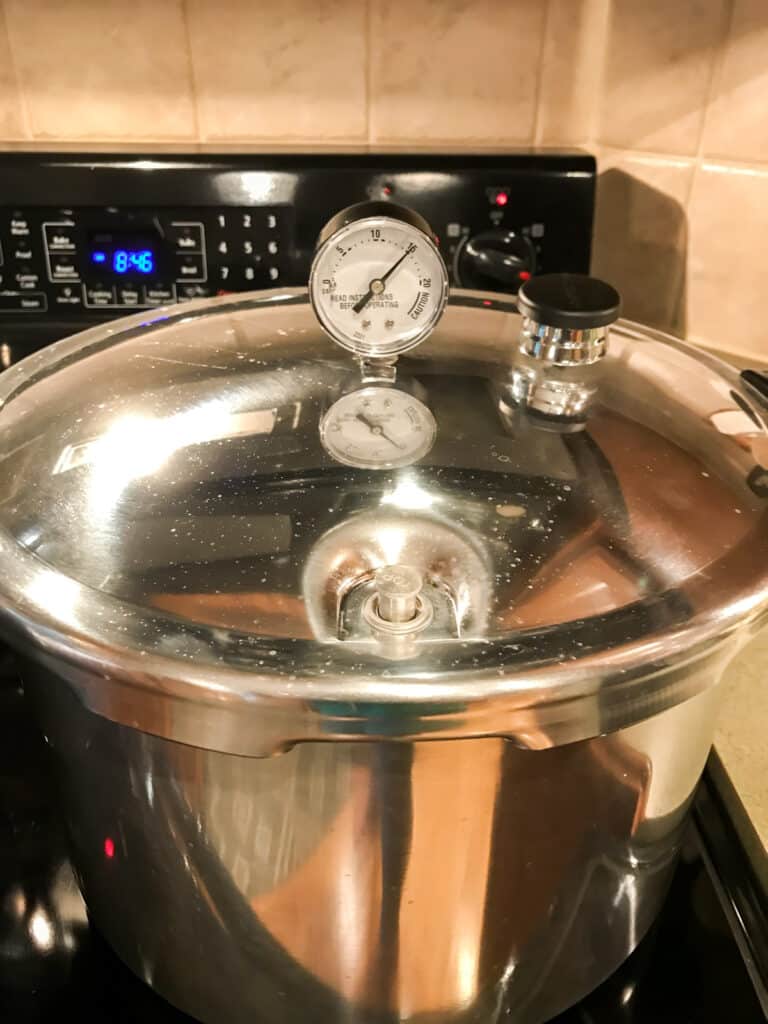
Process the jars: Place a trivet on the bottom of your pressure canner, and using the jar lifter, place the jars in the pot. The pot should have about 2 inches of water in the bottom. Following the instructions of your pressure canner, pressure your jars at 15 pounds pressure for 25 minutes for quart jars and 20 minutes for pint jars. Pounds of pressure and processing time can vary for higher altitudes. The National Center for Food Preservation has some helpful resources for pressure canning guidelines, including how to find your elevation.
After the jars have been processed: After the jars have been processed, turn off the heat and allow the pressure canner to completely depressurize to zero undisturbed. Next, carefully remove the lid of the pressure canner using hot pads, because the steam will still be extremely hot. Remove the hot jars using jar tongs and place them on a cooling rack. Let them sit undisturbed for 12-24 hours and listen for the lids to pop.
Check seals: After the jars have cooled for 12–24 hours, press down on the center of the lids, ensuring they don’t flex up and down. Any unsealed jars should be refrigerated and consumed within a few weeks.
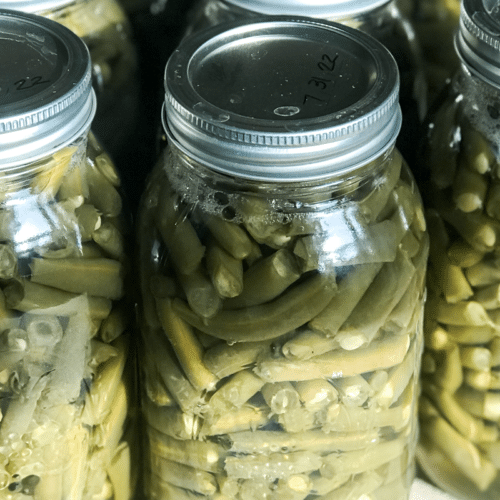
Store and enjoy: Label your sealed jars with the date and store them in a cool, dark place. Allow them to sit for a few weeks before opening them.
How to Serve Canned Green Beans
Part of the fun of preserving food is being able to enjoy it all year round. We love to sauté our canned green beans in bacon grease. Your preserved beans are also perfect in green bean casserole and in soups and stews. Another thing I love to do is give my home-canned green beans as Christmas gifts.
Enjoy Your Old-Fashioned Green Beans
Canning green beans the old-fashioned way not only preserves summer-fresh foods but also keeps alive long-lost traditions. As you dive into the process of canning, you’ll feel a connection to those who had to rely on these techniques to feed their families. So, roll up your sleeves, embrace the nostalgia, and create jars of green beans that will transport you back to simpler times with every bite. Happy canning!
xoxo,
Molly
Canning Green Beans the Old-Fashioned Way
Equipment
- Pressure canner
- Quart-sized canning jars with lids and bands
- Large stock pot
- Small pot
- Ladle
- Jar lifter
- Tongs or magnetic lid lifter
- Canning funnel
- Paper towels
- Kitchen towels
- Timer
- Hot pads
- cooling rack
Ingredients
Instructions
- Prep and wash: Break the tips off the green beans and break them into one to two-inch pieces, or your preferred size. Wash the beans in a clean and sterilized sink twice by filling the sink with the beans and cold water, then place them in a strainer.
- Sterilize the jars: Jars can be sterilized in a number of ways. I place my jars and rings in the dishwasher and run them through the sterilizing cycle. I pull the jars out of the dishwasher when the cycle is complete and the jars are still hot. Another method is to submerge the canning jars into a large pot of water and bring it to a gentle simmer for 10 minutes to sterilize them. Keep the jars in the hot water until ready to pack and fill them.
- Prepare the brine: In a large stock pot, bring water to a boil over high heat. Once it boils, reduce to medium heat and keep the water hot until you’re ready to use.
- Prepare lids: In a small pot, bring water to a low simmer and place canning lids in the pot to sterilize. Keep the lids hot until ready to use. Note: Always use new lids so the jars will seal properly.
- Pack the jars: Carefully remove a sterilized jar from the simmering water using the jar lifter. Pack the jar tightly with green beans, pressing down on the beans in the jar to pack them full. This is called the raw pack method. Once the beans are packed in the jar, leave about an inch of space from the rim to the top of the beans—this is called headspace. Repeat this process with the other jars and beans.
- Add canning salt and water: Put 1 teaspoon of canning salt on top of the beans in each jar. Only use canning salt. If you use pint jars, only use ½ teaspoon of canning salt. Then, using a ladle and canning funnel on top of the jar, add boiling water. Make certain the beans are fully covered while maintaining an inch of headspace.
- Remove air bubbles: Gently tap the jars on the palm of your hand to release any air bubbles trapped within the beans. You can also gently run a bubble popper around the inside of the jar helping to release any trapped air.
- Seal the jars: Using a clean damp cloth or paper towel, wipe the rim of each jar to remove any residue. This will help ensure your lids will seal properly. Using tongs or a magnetic lid lifter, use lids that are in simmering water and place on top of each jar. Using a cloth to hold the jar (because it will be hot), screw the metal band on until it is fingertip-tight. Avoid overtightening the rings.
- Process the jars: Place a trivet on the bottom of your pressure canner, and using the jar lifter place the jars in the pot. The pot should have about 2 inches of water in the bottom. Following the instructions of your pressure canner, pressure can your jars at 15 pounds pressure for 25 minutes for quart jars and 20 minutes for pint jars. Pounds of pressure and processing time can vary for higher altitudes. The National Center for Food Preservation has some helpful resources for pressure canning guidelines, including how to find your altitude.
- After the jars have been processed: After the jars have been processed, turn off the heat and allow the pressure canner to completely depressurize undisturbed. Next, carefully remove the lid of the pressure canner using hot pads, because the steam will still be extremely hot. Remove the hot jars using jar tongs and place them on a cooling rack. Let sit undisturbed for 12-24 hours and listen for the lids to pop.
- Check seals: After the jars have cooled for 12–24 hours, press down on the center of the lids ensuring they don’t flex up and down. Any unsealed jars should be refrigerated and consumed within a few weeks.
- Store and enjoy: Label your sealed jars with the date and store them in a cool, dark place. Allow them to sit for a few weeks before opening them.

 Peach Pie with Crumb Topping
This is so interesting! My grandmother would pickle and can her own pickles when my mom was growing up. She didn’t pass on the skills but I’ll look into this.
Hi Laurel! Please feel free to reach out if you need more information. If you have your grandmother’s pickle recipe, I’d love to try it!
xoxo,
Molly
We canned a lot growing up and had to water bath everything because we had no electricity! We caned pickles potatoes, tomatoes annd corn plus all the fruits and all kind of beans pickles etc! Never even heard of a pressure canner! lol. I am 86 and made over 140 jars of cherry , grape and peach jelly last year! In 40 and 50’s we filled copper boiler l, filled with water affected jars. They sat on wood board. The boiler sat on three flat rocks held up by bricks! Wood burned under boiler and kept it boiling for4 hours for all we canned!! Phyllis Davis Kill from Ohio!
Thank you for posting this. I grew up doing beans just like this with my mom. I just had a million memories as I read through your directions. Quick question. I had two jars that seemed like the water cooked out of them. They appear to be well sealed, but only have maybe an inch or two of water in the jar. There seems to be less beans also so I assume there must have been air pockets I missed or something? Any idea if they are safe or what might have happened?
over the last few years i have had a problem with the bottom dropping out when i pull them out of the cooker do you have any suggestions.
Hi Rickie!
What brand of jars are you using? I always use Ball. Also, do you check the jars for cracks? One last thing, do you put your jars on a trivet so they don’t sit directly on the heat? I hope these suggestions might help!
xoxo,
Molly