This simple cake decorating technique is the perfect cake design for a birthday, wedding shower, baby shower, or even a wedding. It’s so pretty and so delicious, your guests will think it came from a bakery.
Cake Decorating is a Fun Hobby
I love decorating cakes, but it is really just a hobby for me. I can be creative while ending up with a delicious confection, so it’s a win-win.
When I was growing up, my mom decorated cakes as a hobby, and she taught me how. I have also taken a few cake decorating classes just for fun, which is where I learned that the simplest technique sometimes turns out to be the most impressive.
The Cake Recipe
The cake recipe I use is a homemade white cake recipe that my mom shared with me. It uses basic ingredients such as flour, sugar, and vanilla, but it requires six egg whites beaten stiff. Egg whites make the cake moist, but also somewhat dense like pound cake, which is great for making a stacked cake.

The cake I am demonstrating is a six-inch cake with two layers. This recipe makes enough for the two six-inch layers plus six cupcakes or two eight-inch layers.
White Cake Supreme
Ingredients
- 3/4 cup shortening I use high-ratio, because it combines better than regular shortening
- 1 1/2 cups sugar
- 1 1/2 teaspoons vanilla
- 1/2 teaspoon almond extract
- 2 1/2 cups flour
- 3 teaspoons baking powder
- 1/2 teaspoon salt
- 1 cup milk
- 6 stiff-beaten egg whites
Instructions
- Preheat oven to 375 degrees.
- Grease and flour two six-inch cake pans, and line six muffin cups with cupcake liners.
- Cream shortening and sugar until light and fluffy.
- Add vanilla and almond extract, and mix well.
- Combine flour, baking powder, and salt. Add to creamed mixture alternating with the milk, beginning and ending with the dry ingredients beating well after each addition.
- Beat 2 minutes with electric mixer.
- Fold in egg whites.
- Pour batter into pans and muffin tin. Bake muffins approximately 20 minutes, or until toothpick comes out clean. Bake cakes an additional 10 minutes, or until toothpick comes out clean.
The Frosting Recipe
I use a buttercream frosting recipe, and I get lots of requests to share it. The recipe is a modification of the Wilton recipe, but I’ve given it my own twist.
One of the most important ingredients I use is high ratio shortening. High ratio shortening combines better with sugar and liquid, so it won’t break down as easily. It also gives the frosting a much creamier and smoother texture.
When it comes to buttercream frosting I like mine to be a little less stiff, because I find it easier to work with. I use gel icing colors to tint the frosting, because it gives the icing a more vibrant color. To frost the six-inch cake and six cupcakes, double the following recipe.
Buttercream Frosting
Ingredients
- 1 cup of high ratio shortening
- 4 cups powdered sugar
- 1/2 teaspoon clear vanilla
- 1/4 teaspoon almond extract
- 1/4 teaspoon butter flavor
- 2 to 4 tablespoons water
- Gel Icing Color
Instructions
- Beat shortening and sugar until creamy.
- Add flavors and beat well.
- Add water one tablespoon at a time to obtain a consistency smooth enough to frost the cake. (I usually use all four tablespoons).
- Once the frosting is the consistency you prefer, add gel icing color to obtain the color you want.
Decorating the Cake
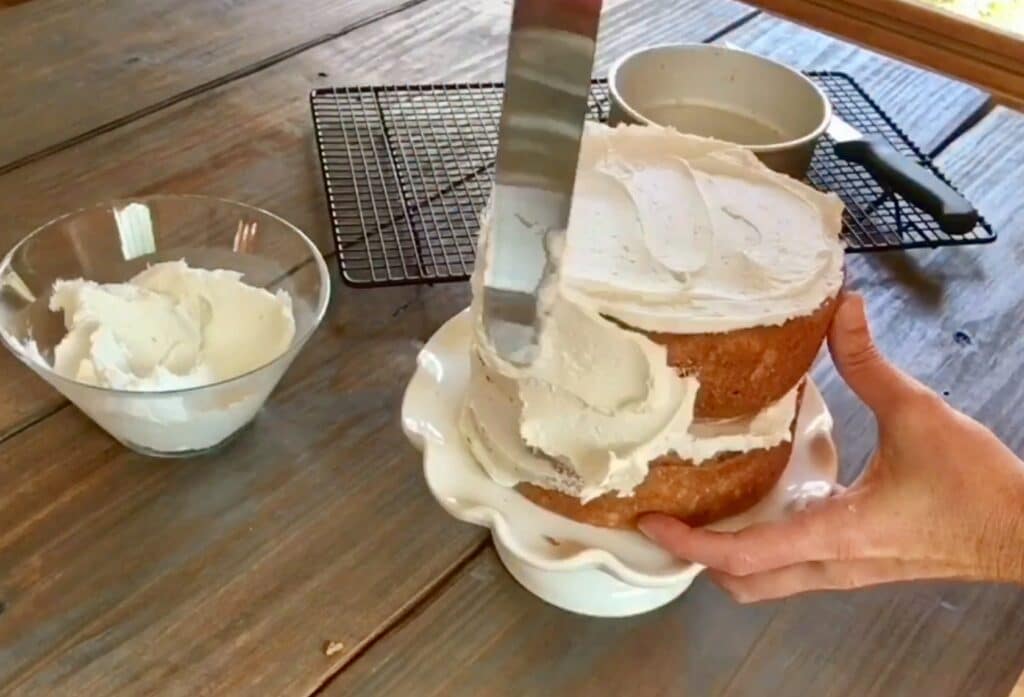
I begin with baking my cake, and making sure it is completely cooled. If not, the frosting will begin to melt and won’t maintain the proper consistency for decorating.
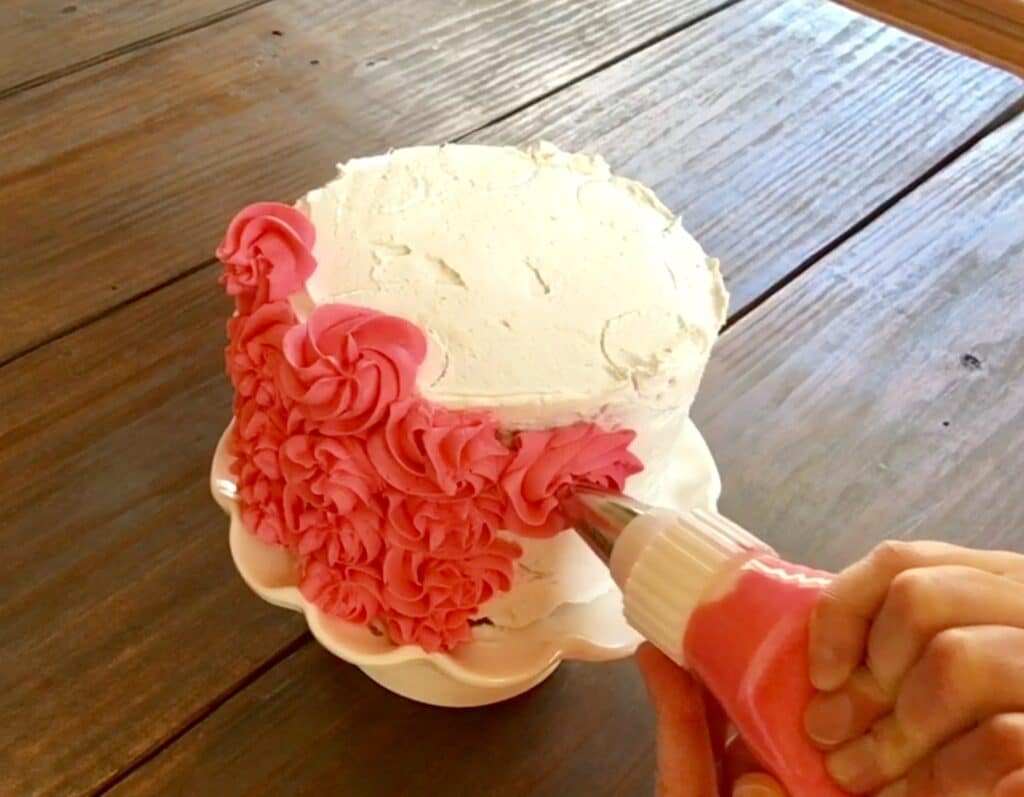
After the cakes are cooled, put on a crumb coat, which is a light layer of frosting all over the cake. This allows any crumbs on the cake to stick to this layer of frosting and not your final layer for everyone to see.
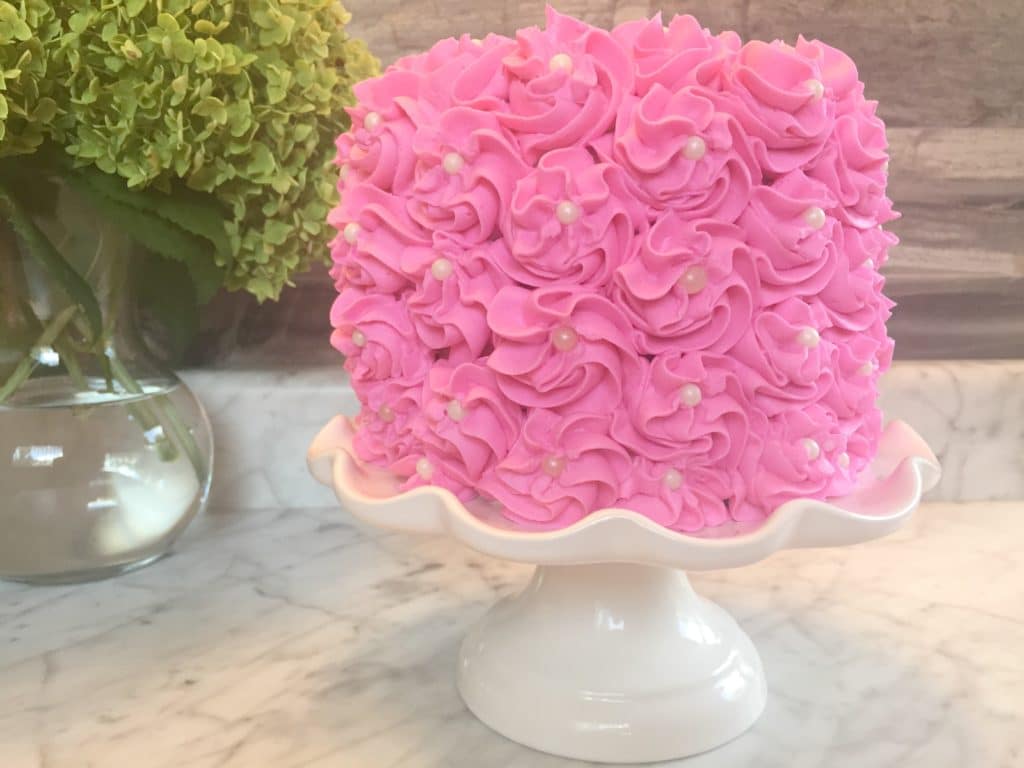
The technique I’m sharing with you involves putting large rosettes all over the cake. This is a very simple technique, but looks elegant at the same time. It is also very forgiving–if the rosettes are scattered or different sizes, it still looks great!
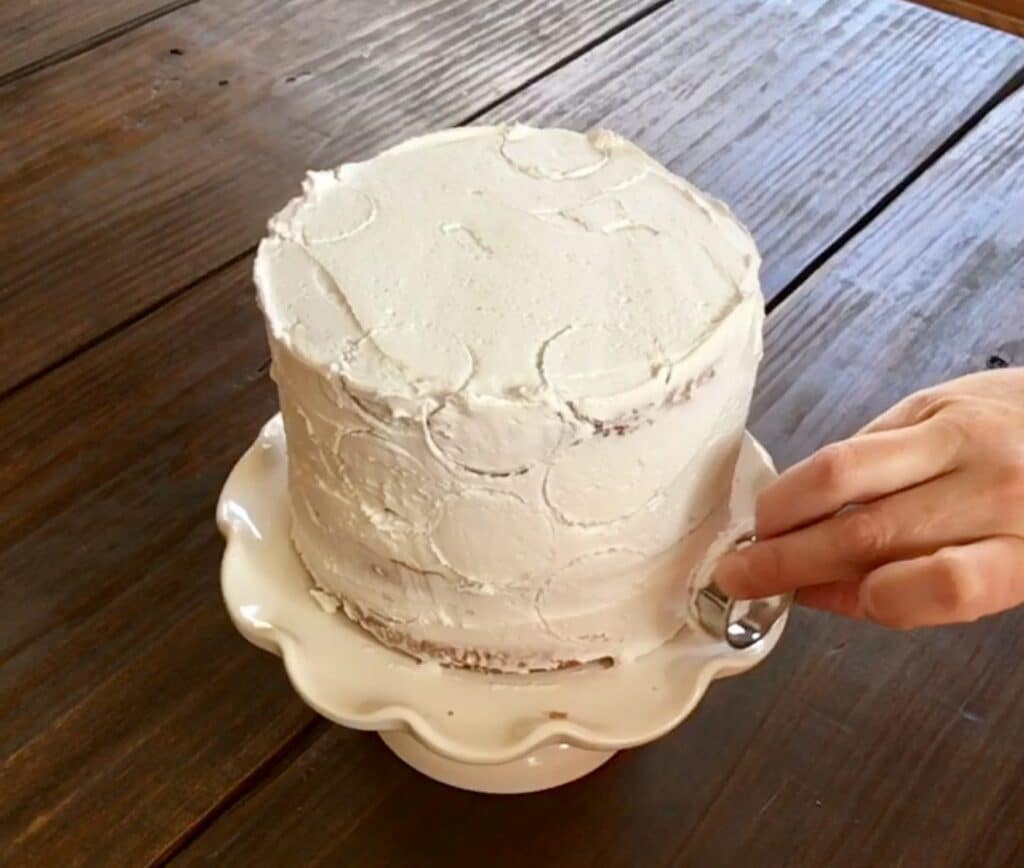
After the crumb coat, I use a circle cookie cutter to place circles all over the cake. This will help with keeping the rosettes in somewhat of an order, so you don’t have too much space in between them. However, they don’t have to be perfectly uniform, because as I mentioned above this technique is very forgiving.
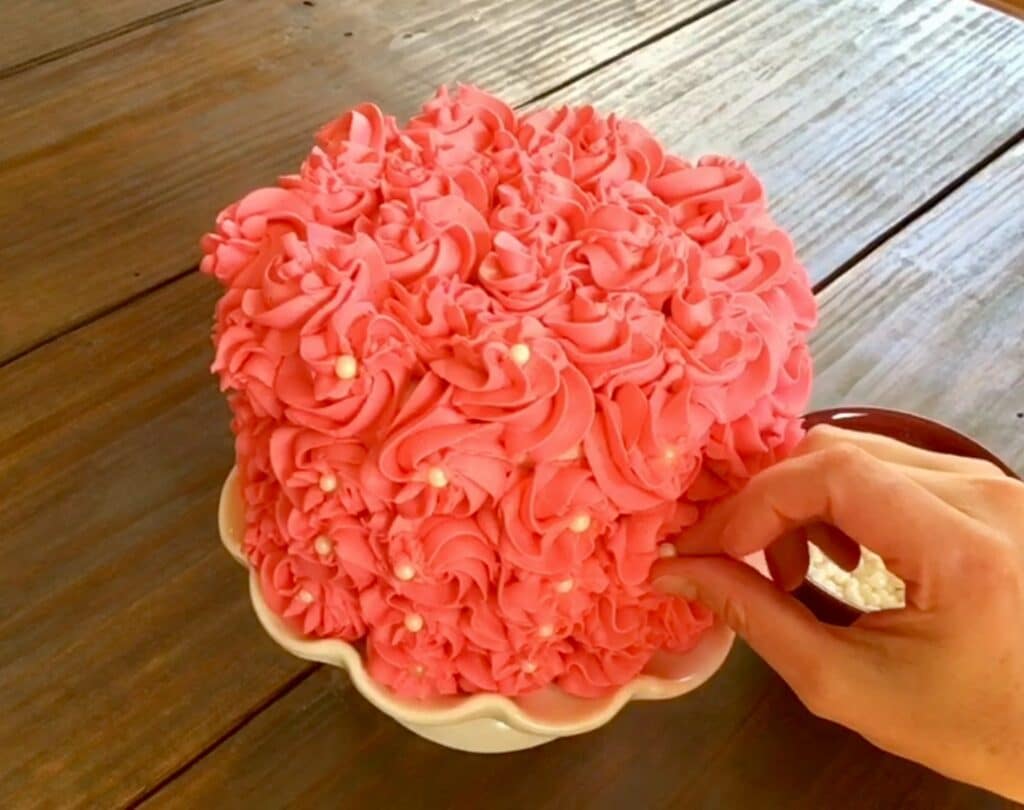
Using tip 1M, place rosettes within all of the circles on the cake. It’s a simple circular movement to create rosettes. You can watch the video below to see how I make them.
Once the rosettes are finished, I place an edible pearl in the center of each one. This decorating technique is so simple, yet so impressive. Happy cake decorating!
xoxo,
Molly
 Clinique Makeup Unboxing Video
I’ve never heard of high-ratio shortening. What’s the difference between that and say, Crisco?
Hi Gena!
Great question. High ratio shortening more less combines with the other ingredients much better, give the frosting a creamier texture, and is much more stable than using Crisco. I also feel like it gives the frosting a less greasy texture. I hope this helps!
XOXO
Molly