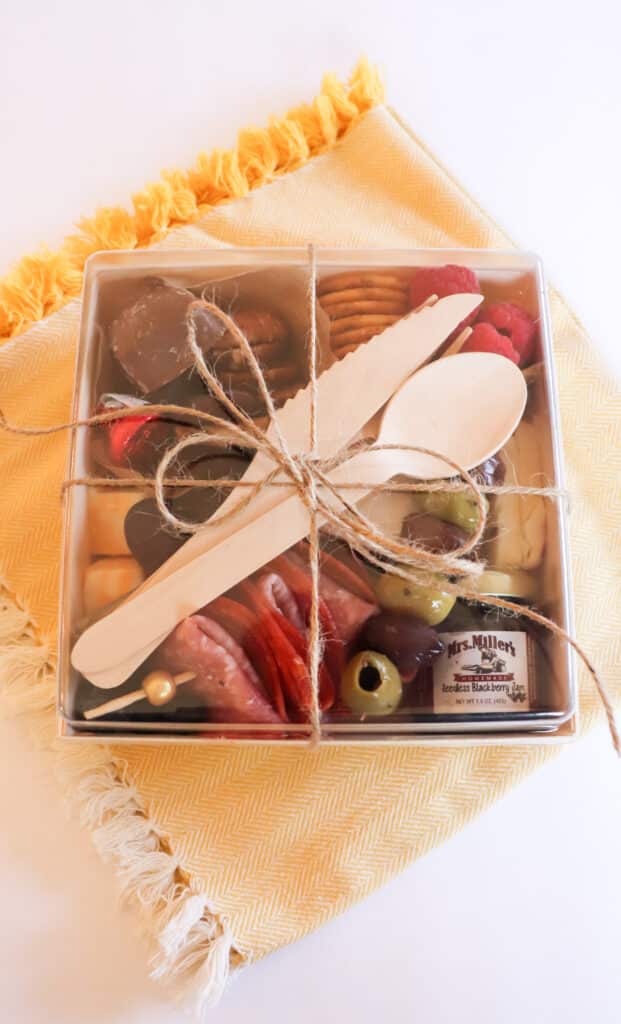
DIY individual charcuterie boxes are a miniature version of a traditional charcuterie board full of meat, cheese, fruit, and so much more, all nestled into an adorable to-go box. These charcuterie boxes are super easy to make and the perfect way to serve an impressive appetizer for special occasions.
This post may contain affiliate links. Please read my disclosure policy for more information.
What is a DIY Charcuterie Box?
These DIY individual charcuterie boxes, sometimes called grazing boxes, are a fun way to package all things charcuterie. There are so many different ways to design these boxes and so many ways to serve them.
Essentially, they are individual charcuteries, similar to jarcuteries, packaged in a to-go box. This makes them easy to transport and easy to serve at your next function. They are perfect for any special events such as a bridal shower, baby shower, graduation or birthday party, or even corporate events. These charcuterie boxes are also perfect for your next picnic or date night.
What type of boxes work best for these individual charcuterie plates?
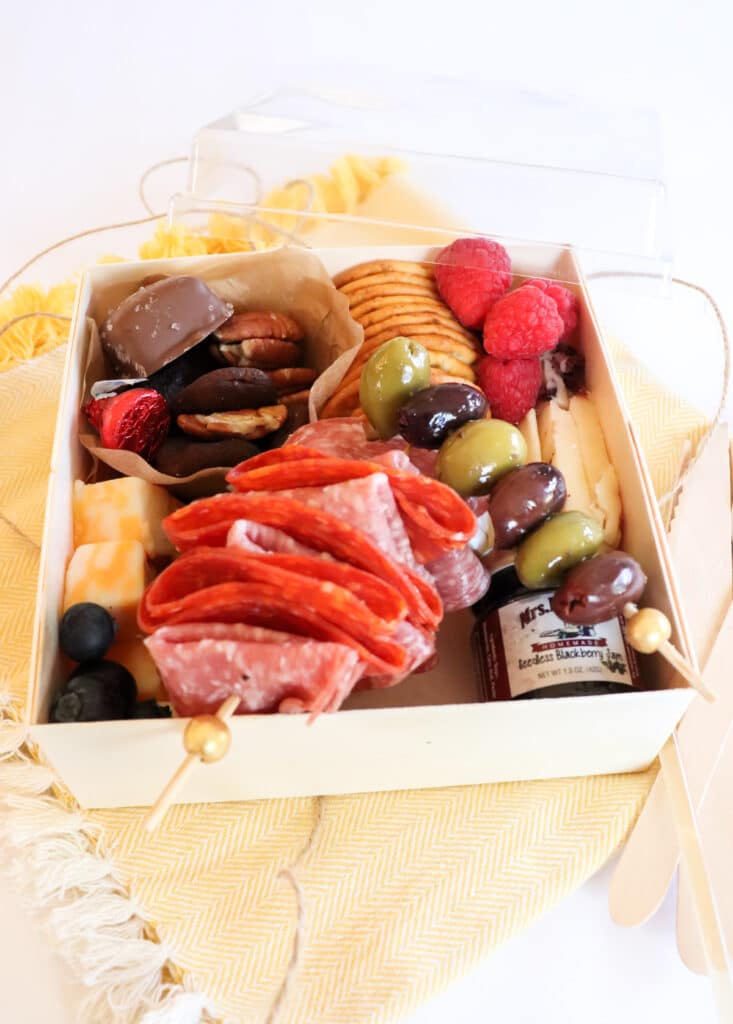
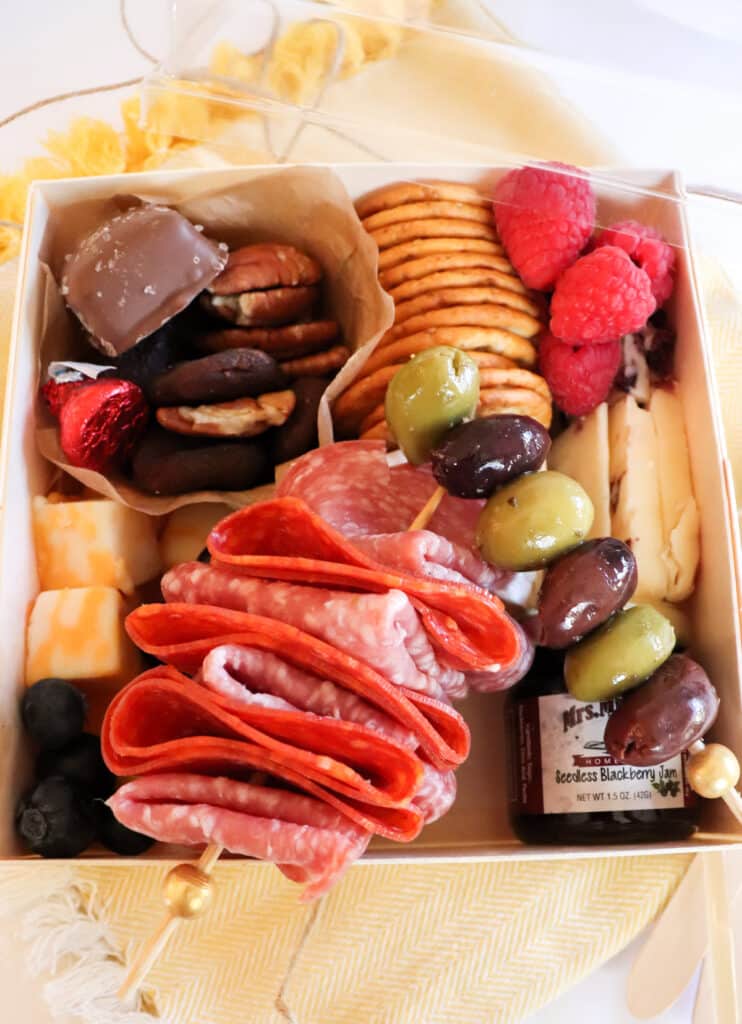
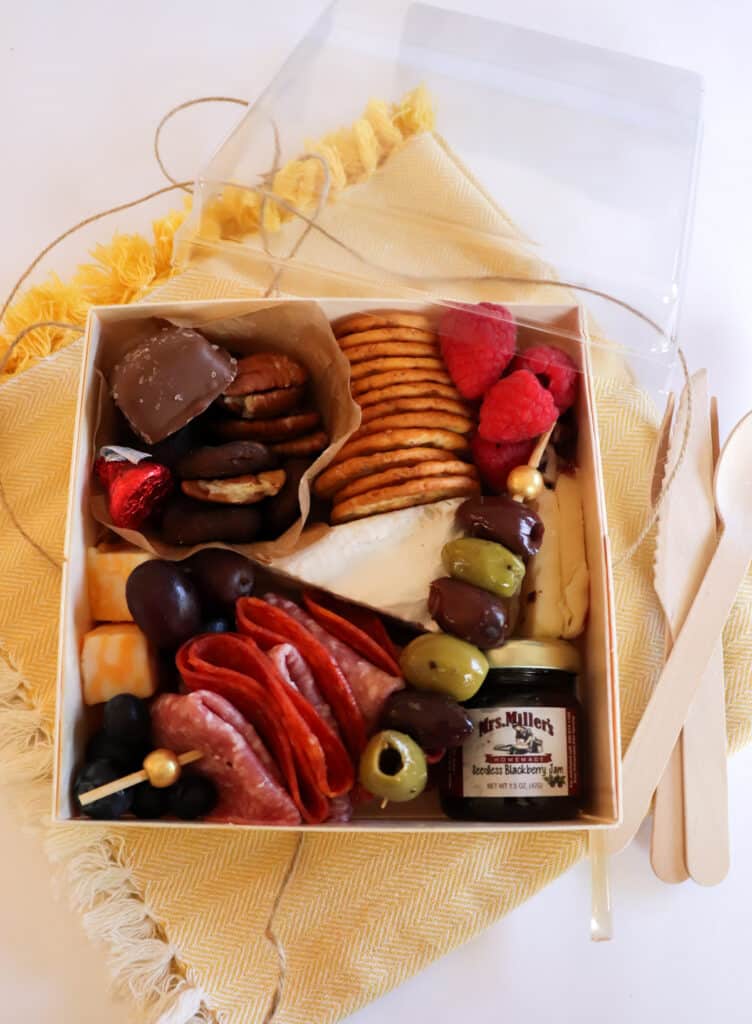
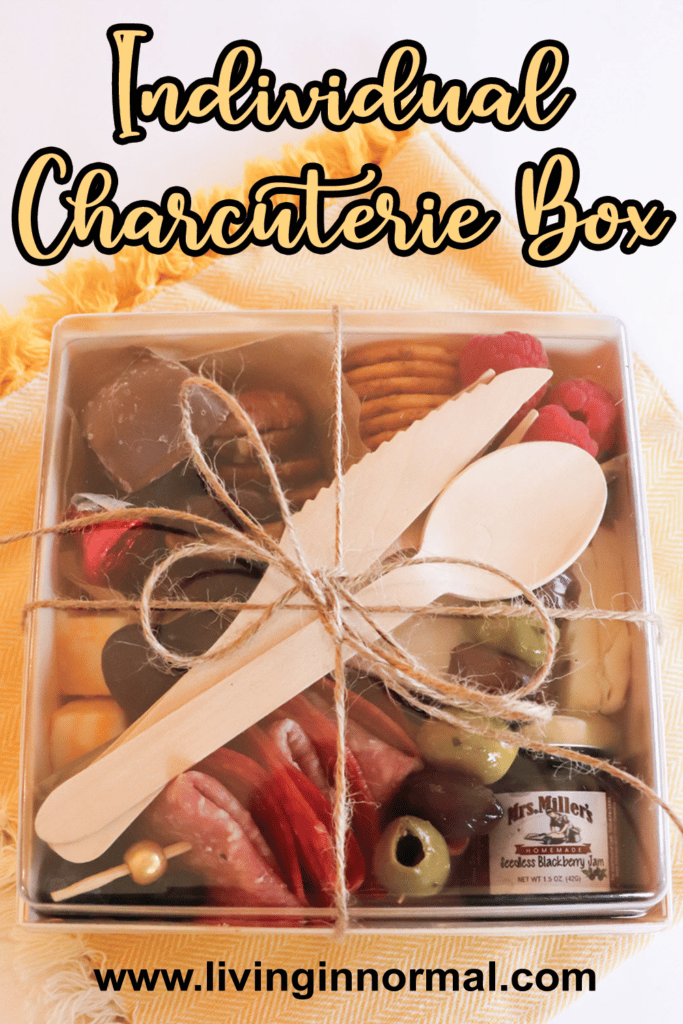
There are so many different boxes to choose from, it depends on how big you want to make your charcuterie boxes. If this were the only thing you are serving, a larger box would work best. This 7 inches by 7-inch box is a great option and has a clear lid for the perfect display.
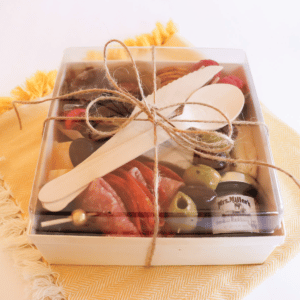
If you want to make your charcuterie boxes a tad smaller, this 5.5 inches by 5-inch box is a great option, and even comes with bakers twine to wrap them up into a little charcuterie gift box.
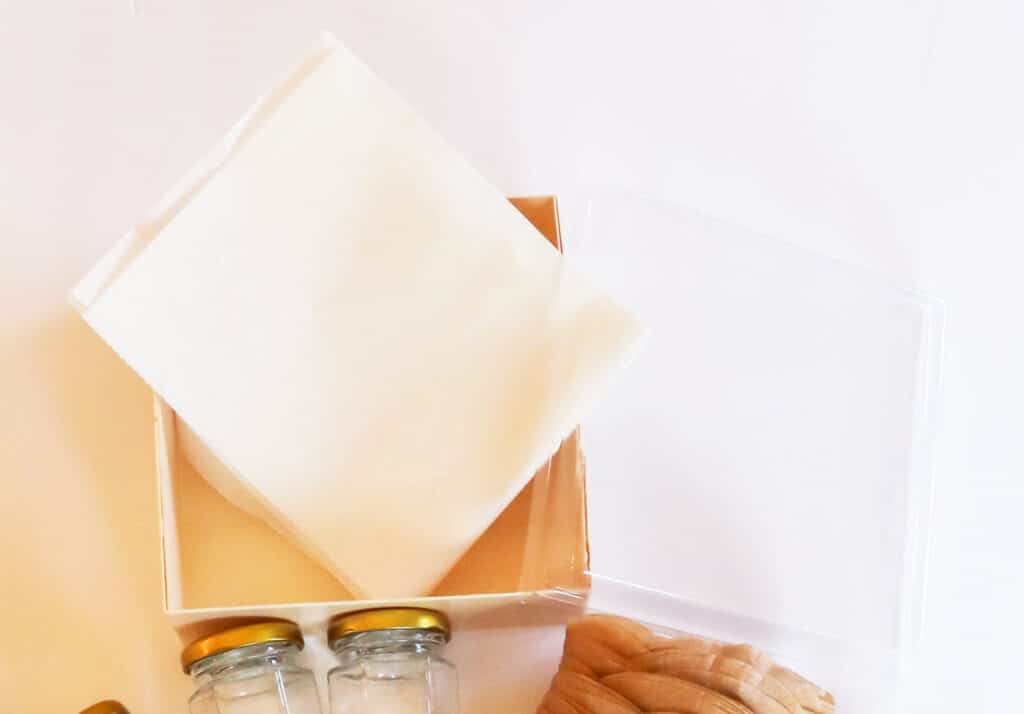
Many of the charcuterie boxes are grease-resistant, but I like to lay a piece of parchment paper in the bottom of the box so that nothing soaks through.
What supplies are needed?
The supplies can vary for each charcuterie box. It depends on how big your box is and how many different items and fun ideas you want to include.
- Small jars for honey and/or jelly and jams
- Honey dippers
- Disposable mini silverware
- Baking cups or parchment cups (optional)
- Parchment paper
- Skewers for the meat, cheese, olives, etc.

What goes in an individual charcuterie box?
Use your imagination, because the sky is the limit on what to include in your mini charcuterie boxes. Here are some of the things I love to include when I make mine:
- Fresh fruit and/or dried fruits
- Hard cheese and/or soft cheese
- Artisan cheese
- Cold cut meats, salami, or summer sausage
- Sweet treats – such as chocolate, cookies, or other candies
- Honey sticks or small honey jars with mini honey dippers
- Tiny jam or jelly jars
- Crackers
- Castelvetrano olives or Kalamata olives
- Nuts or trail mix
My DIY individual charcuterie boxes can vary depending on things that are on sale at the store. With the cost of groceries so high, I tend to look for great prices on fruit, meat, and cheese. I like to buy blocks of cheese and cut them. If I want to keep it simple when putting my boxes together, I will use already cubed cheese, cheese sticks, or mini brie wheels.
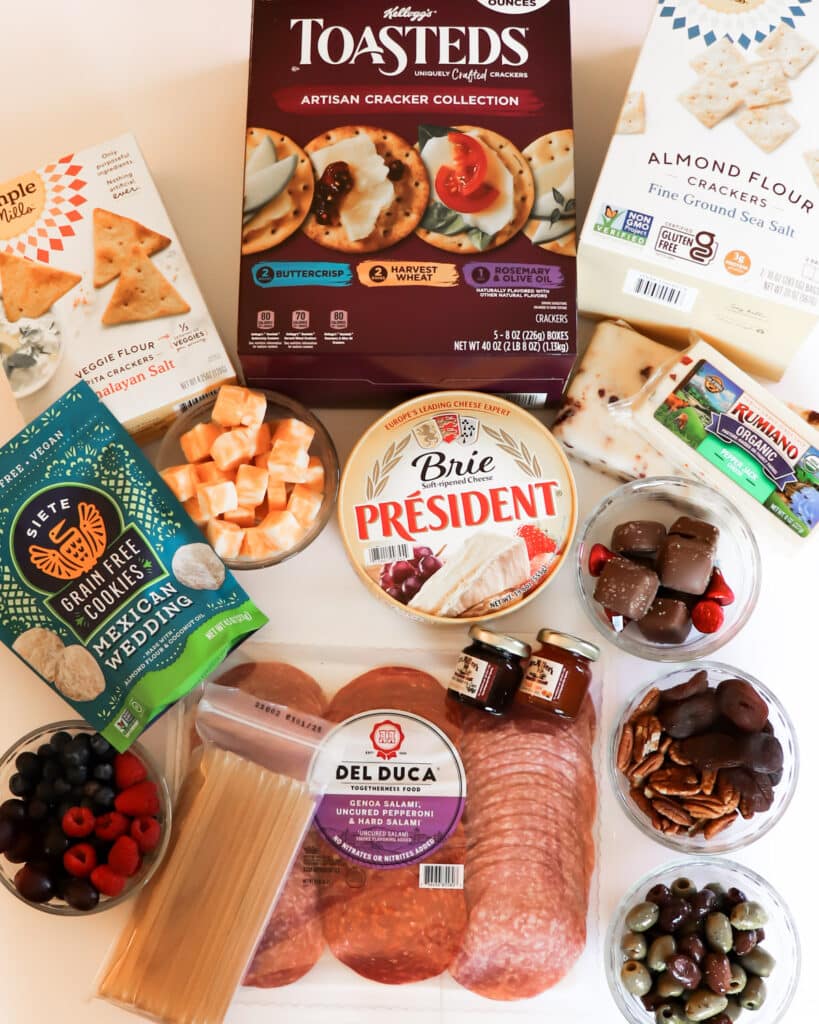
I’m also conscious of the dietary needs and dietary preferences of the guests who will get to enjoy these mini charcuterie boxes. I have some vegetarian friends, so I just leave out the meat and add in extra cheese, fruit, and sweet treats. I also have some gluten-free friends, and I use Simple Mills crackers for those boxes.
How I assemble my individual charcuterie boxes
Assembling the boxes is the best part. You can be as creative as you want, and you can make them as fancy or as simple as you want.
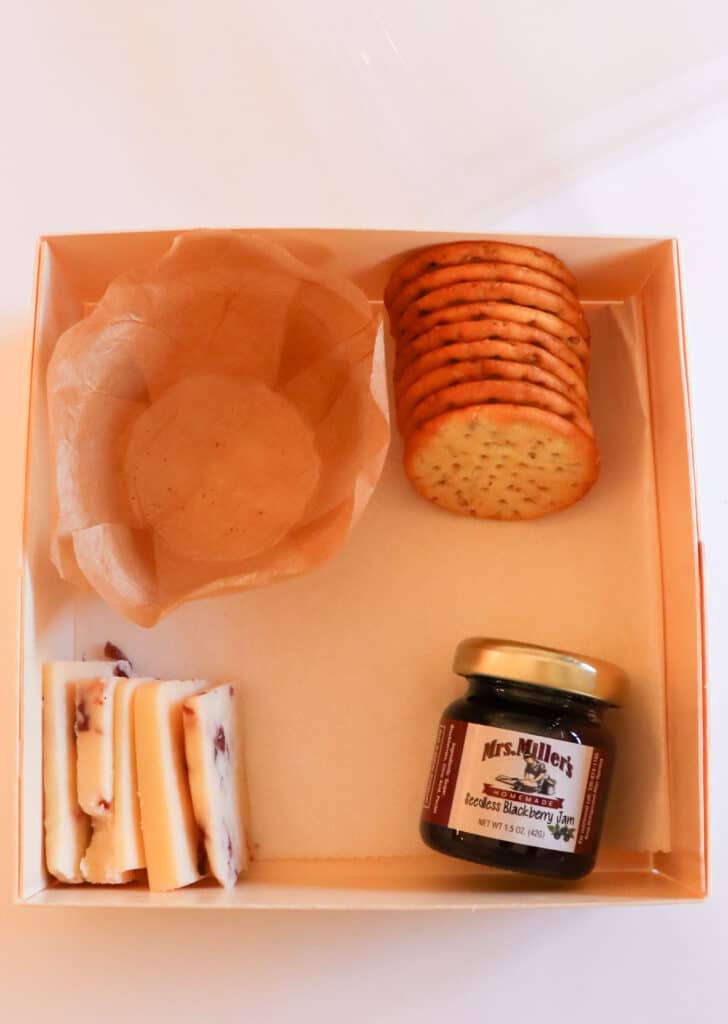
I like to include small jars with honey and/or jams or jellies—mainly because they look so cute. However, you can use a honey stick to keep it super simple. I also like to use baking cups to help keep some of the items separated.
Here is how I like to assemble my boxes:
- Get your boxes ready first. Depending on which box you choose, it might need to be assembled.
- Layer a piece of parchment paper on the bottom of the box.
- Fill any jars you intend to use with honey and/or jams or jellies.
- Place olives and meat on skewers.
- Place any other small items into baking cups or parchment cups such as nuts or trail mix.
- Organize all of your ingredients so you can have a sort of assembly line to fill the boxes.
- Add jars and parchment cups to the boxes first.
- Add crackers (and cookies if you are using them).
- Fill the boxes with meats, cheeses, and fruit, layering as necessary so the box appears full.
- Tuck a piece of chocolate into the box.
- Lay mini silverware and honey dippers (if using honey jars) or honey sticks over the top or tucked into the side.
- For a pop of color, add fresh herbs such as a sprig of rosemary or edible flowers.
- Place lid on top and tie with twine or ribbon.
As I layer the items in each individual charcuterie box, I tuck some smaller items into the empty spots. For example, I was able to tuck some extra cheese cubes and blueberries under the skewer of meat.
How far in advance can I make my grazing boxes?
For maximum freshness, the boxes are best when served fresh. Otherwise, your meats and cheeses will dry out and your crackers will get soggy. I recommend making them the day of or the day before. I typically make mine the day before, cover them tightly, and store them in the refrigerator. So far, they have turned out great.
They will last a few days in the refrigerator after your get-together, but I wouldn’t recommend serving them to a crowd after a day. Indulge in them yourself.
Enjoy the party
These Individual Charcuterie Boxes are so much fun to put together and make a great gift! You can create them for your next party, date night, or even for after-school snacks. For a date night or a picnic, you can include a small bottle of wine. I hope you have as much fun creating them as I do!
xoxo,
Molly
Individual Charcuterie Box
Equipment
- Charcuterie Boxes
- Skewers for the meat, cheese, olives, etc.
- Small jars for honey and/or jelly and jams
- Honey dippers
- Disposable mini silverware
- Baking cups or parchment cups (optional)
- Parchment paper
Ingredients
- Fresh fruit and/or dried fruits
- Nuts or trail mix
- Castelvetrano olives or Kalamata olives
- Crackers
- Tiny jam or jelly jars
- Honey sticks or small honey jars with mini honey dippers
- Sweet treats – I like to include chocolate, cookies, or other candies
- Cold cut meats, salami, or summer sausage
- Hard cheese and/or soft cheese
- Artisan cheese
Instructions
- Get your boxes ready first. Depending on which box you choose, it might need to be assembled.
- Layer a piece of parchment paper on the bottom of the box.
- Fill any jars you intend to use with honey and/or jams or jellies.
- Place olives and meat on skewers.
- Place any other small items into baking cups or parchment cups such as nuts or trail mix.
- Organize all of your ingredients so you can have a sort of assembly line to fill the boxes.
- Add jars and parchment cups to the boxes first.
- Add crackers (and cookies if you are using them).
- Fill the boxes with meats, cheeses, and fruit layering as necessary so the box appears full.
- Tuck a piece of chocolate into the box.
- Lay mini silverware and honey dippers (if using honey jars) or honey sticks over the top or tucked into the side.
- For a pop of color, add fresh herbs such as a sprig of rosemary or edible flowers.
- Place lid on top and tie with twine or ribbon.
 How to Cook a Boneless Rib Eye Roast
Absolutely love this idea!! Going on a day trip soon. I’m going to make these for a “fun” lunch stop along the way! Such a great idea! Thank you so much!