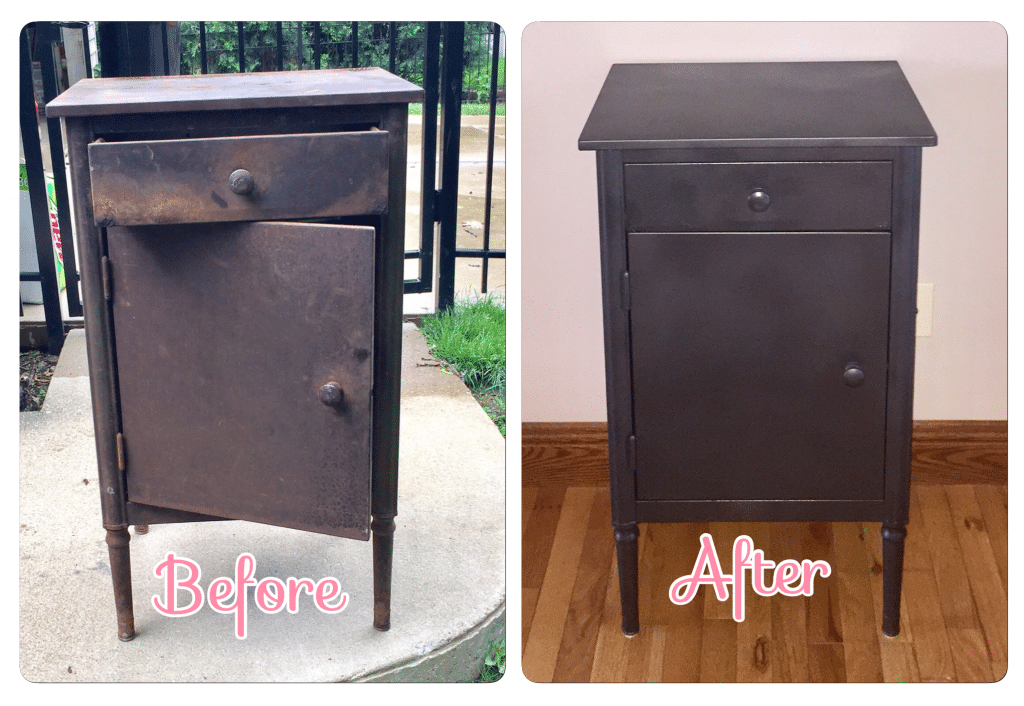
Vintage Metal Tool Chest Makeover: The before and after of a rusted out vintage tool chest.
We have had an empty space in our home since we moved in 5 years ago. It’s a small space, and I didn’t want to clutter it up or buy anything that overpowered the area.
I was in Restoration Hardware looking for dining chairs and mentioned this empty space to the sales lady. After I shared some pictures with her, she came up with the most unique idea—an industrial tool chest. The problem with this metal tool chest: the price. I know Restoration Hardware is pricey, but for the small tool chest she recommended, the cost was $750 plus $329 for shipping. They do have a membership plan for $100 that saves 25% off every purchase, but I still didn’t think the metal tool chest she recommended was worth the price.
On the hunt for a metal tool chest
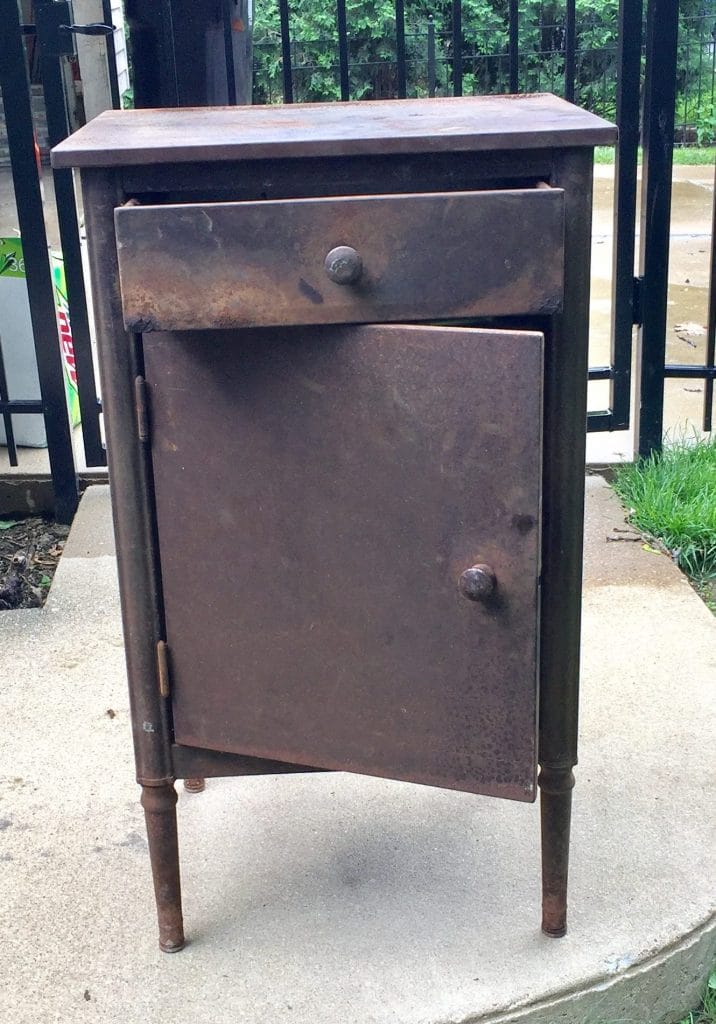
In Bloomington, Illinois, from May—October, there is a huge market every third Sunday of the month. It is called Third Sunday Market, and it has hundreds of booths with just about anything you can think of—antiques, crafts, new items, furniture and the list goes on and on. Low and behold, at the first market of the year in May, I found exactly what I was looking for and it cost me $50: a rusted metal tool chest.
Removing the rust
I brought the rusted out metal tool chest home, and I had no idea where to begin. Pinterest to the rescue! Several posts kept popping up about using vinegar to remove rust. I decided to give it a try.
My next step was a trip to Costco where I bought several big bottles of vinegar. I put the vinegar in a kiddie pool and soaked the tool chest for a couple of days. Every few hours I would turn it over so all sides would soak in the vinegar. Then, I used steel wool to help scrub off the excess rust.
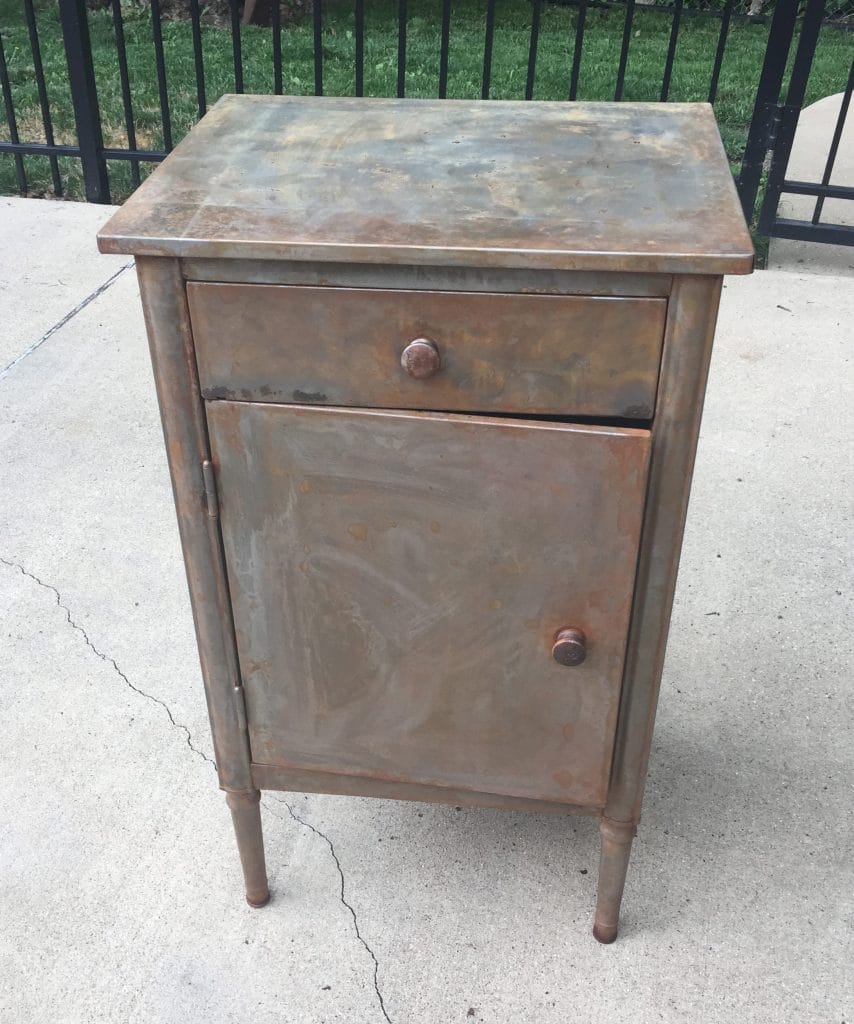
Viola! I can’t believe how well this worked. This vinegar tip saved me hours of sanding the rust off. After the chest was finished in the vinegar pool, I let it dry out. Every couple of days I would take a damp towel with vinegar on it and wipe off rust residue until it was in good enough shape to paint.
There is a spot on the front drawer that was completely rusted out (bottom left corner of the drawer in the picture below), but I think it gives it character. I was able to grind down the roughness on the drawer, along with a couple of other spots, using my husband’s hand drill and a wire brush attachment.
Painting the metal tool chest
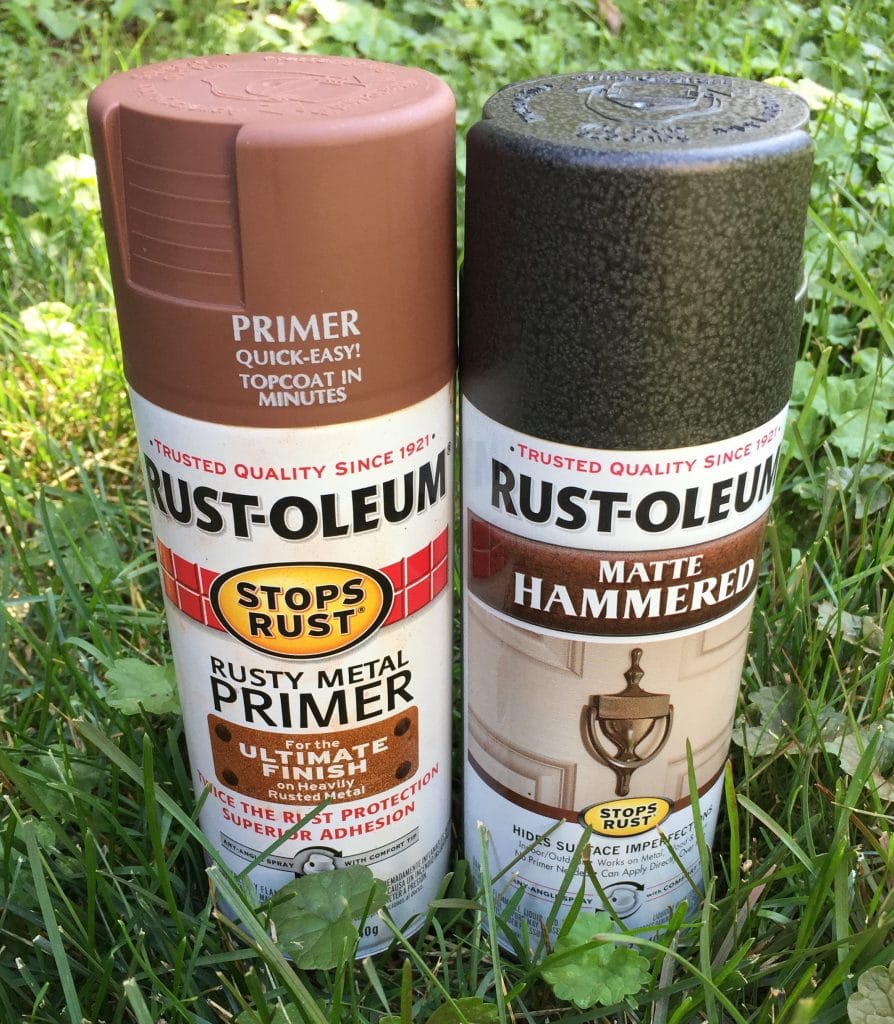
I used two cans of Rust-oleum Rusty Metal Primer, because I wanted to make sure I had a good base coat. The beauty of Rust-oleum paint is that it can be used to paint over and seal rust.
I let the primer dry for a day and then painted my tool chest. I used three cans of Rust-oleum Matte Hammered textured paint, but that’s because I had a few issues. Otherwise, I probably would have only needed two cans.
The first issue I encountered was when I sprayed too close to the tool chest, which caused the paint to drip. I then had to use steel wool to smooth out the drip spots and repaint them. I also had a few issues making the texture of the matte hammer work how I wanted it to. The texture didn’t really look like I originally envisioned, but I am super happy with the results, and I love the color.
I let the tool chest dry for a day, and then moved it into the space in our home that needed to be filled. I must say, I love the final results. And the price…drum roll…$112!

THE COST BREAKDOWN
| Rusted Metal Tool Chest | $50 | |
| Vinegar (6 boxes) | $26 | |
| Kiddie Pool | $ 9 | |
| Two cans of Rust-oleum Primer | $ 7 | |
| Three cans of Rust-oleum Matte Hammered Paint | $17 | |
| Steel Wool | $ 3 | |
| Total | $112 |
I love how much I saved by doing this myself! Even if I paid for the $100 membership at Restoration Hardware, their tool chest would still cost me almost $800. I adore Restoration Hardware, but I could not justify spending that much on a tool chest.

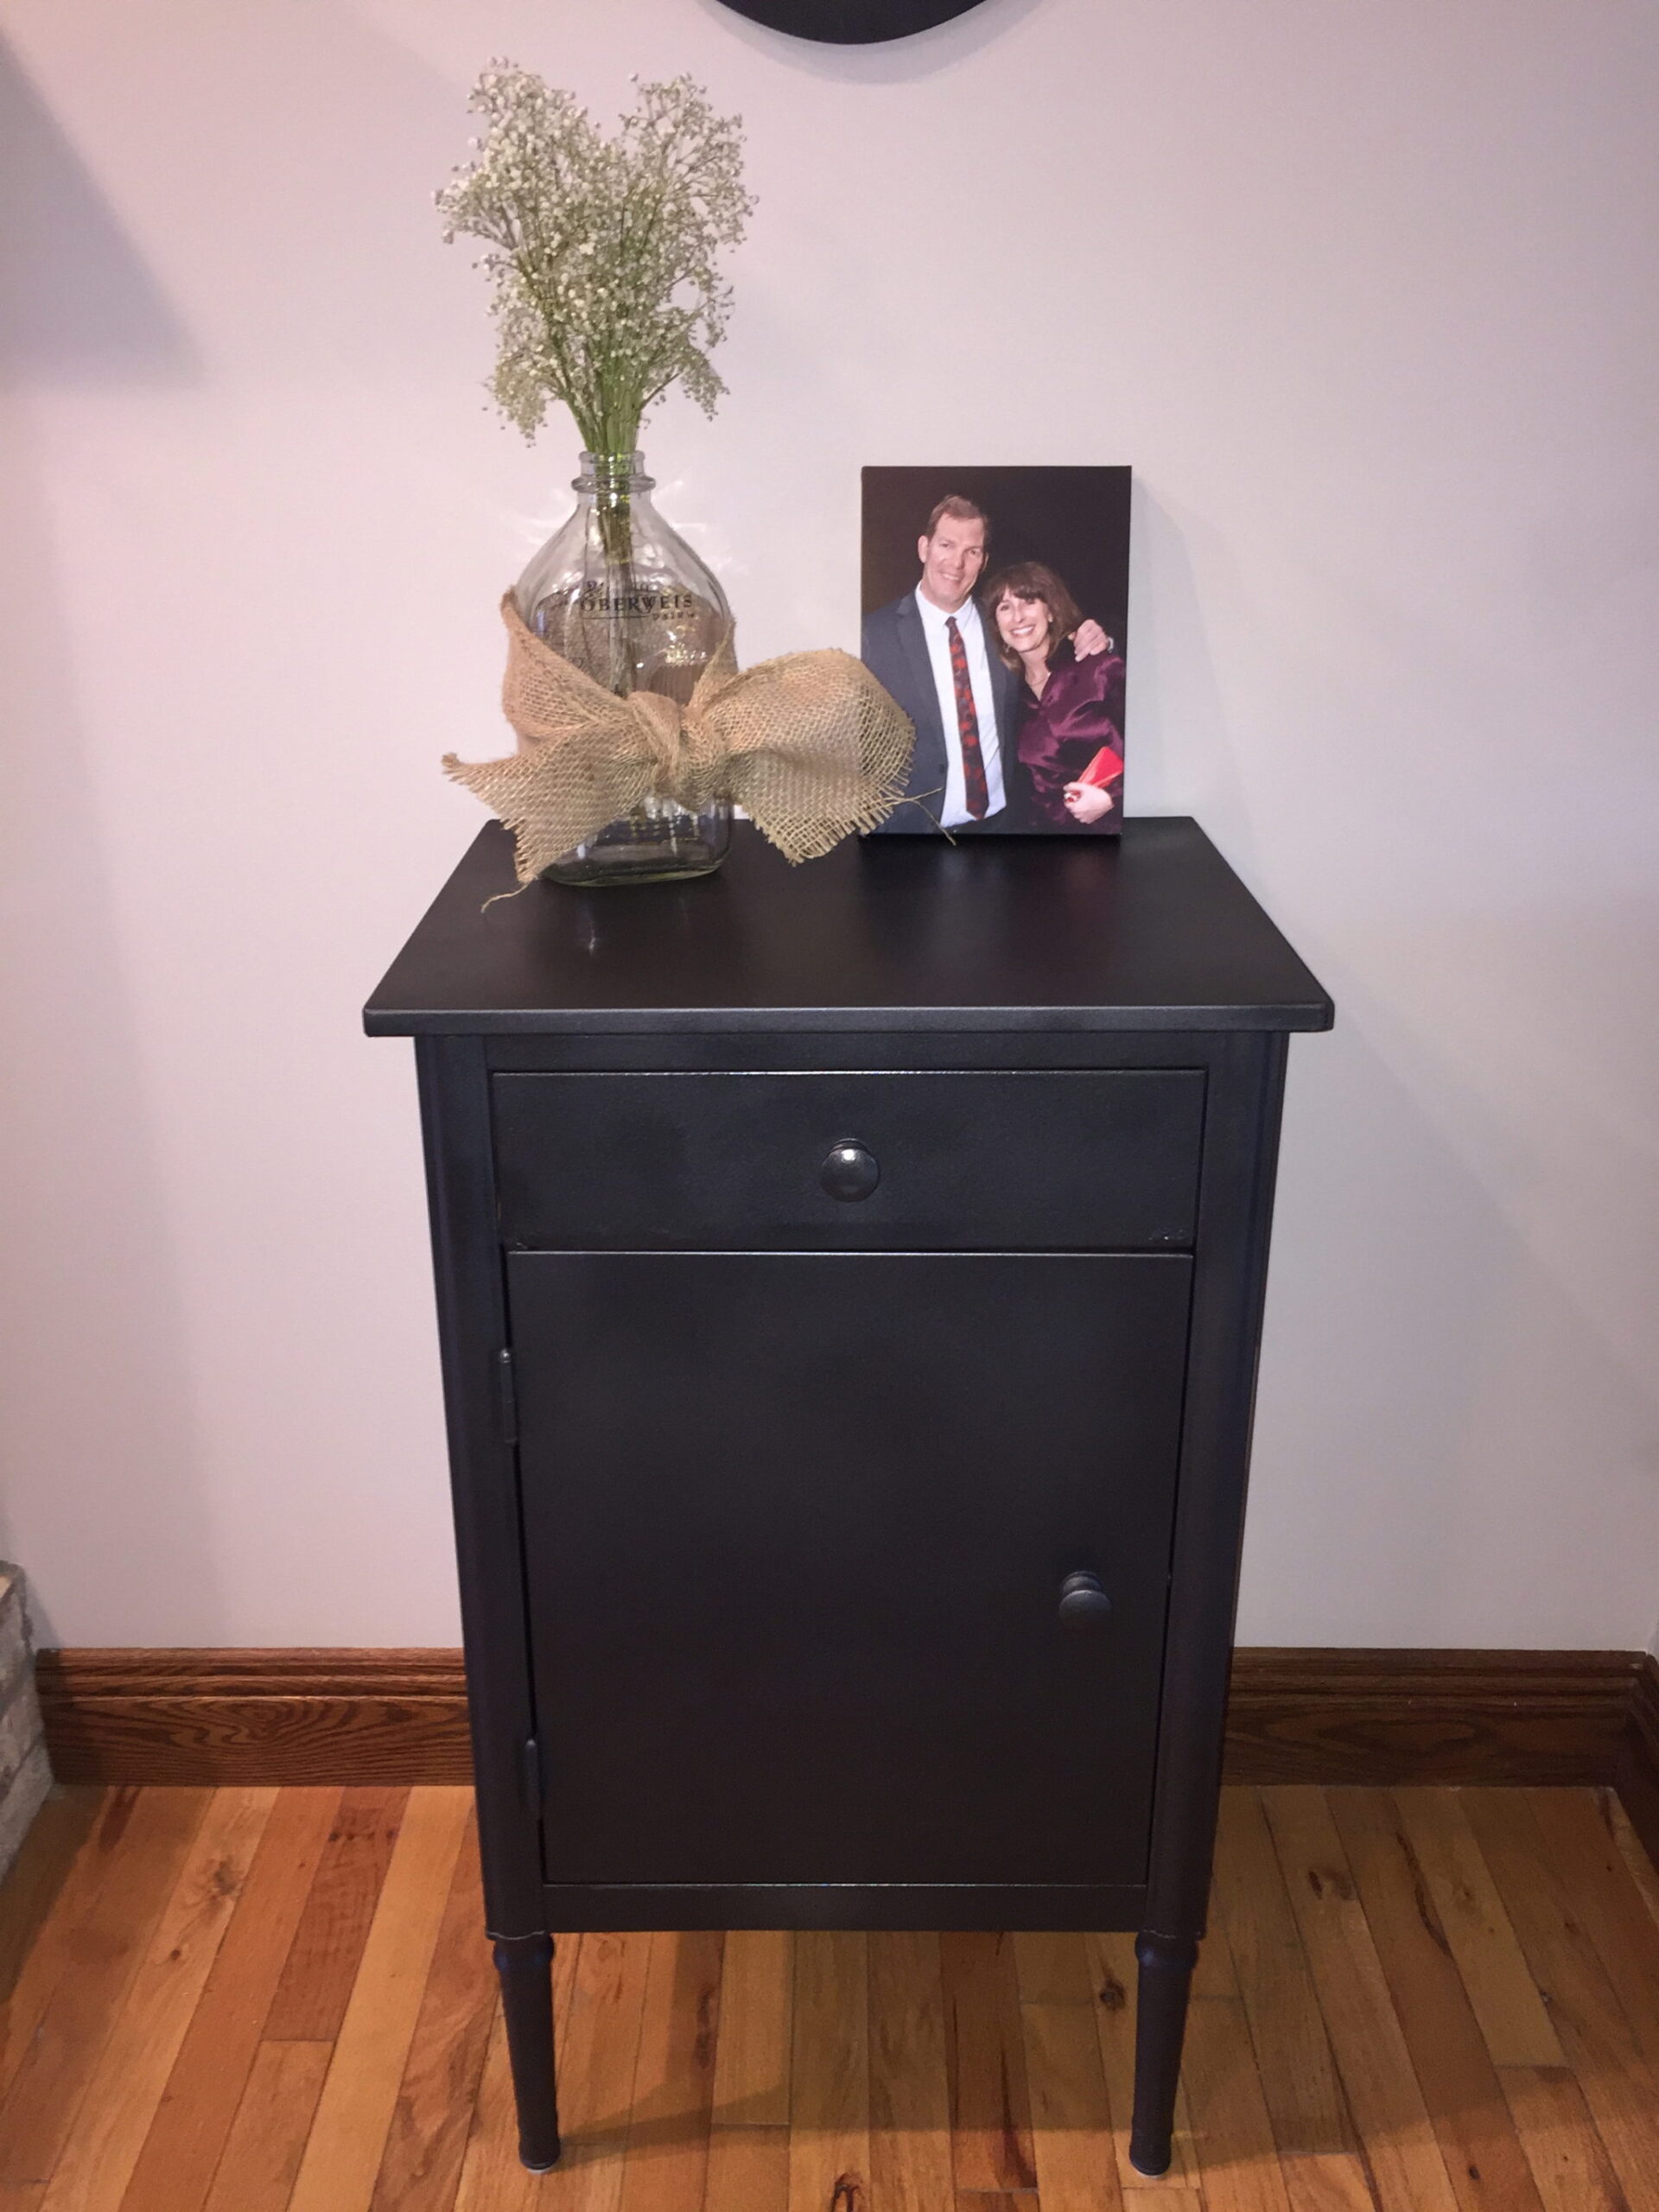
The added bonus of doing it myself is the sense of accomplishment. I love how my vintage metal tool chest turned out!
xoxo,
Molly
 A Summer Gift Idea
Love your blog! Wonderful information and so many great ideas. Looking forward to reading more!
Thanks, Mom!! So glad you love it!
Grandma would love the vinegar solution! ?
Aunt Susie! That is so funny! Yes she would! Vinegar fixed everything! 🙂
Molly – Love the tool chest! Much more fun to re-do something instead of buying something new. Hope you have fun with the blog. I wrote a blog post a few years ago that reminds me of your re-do. I took an old map cabinet and turned it into a storage piece for my stamps. You probably need this more that I do! http://www.kcweekendgirl.com/craft-room-organizing-ideas-storage-cabinet-redo/
Hi Carla! Thanks for the sweet comment. And oh my gosh, that map cabinet is beautiful! You did an amazing job! I am having soooo much fun with the blog. I’ve wanted to do it for a while, but just now finally got around to doing it.