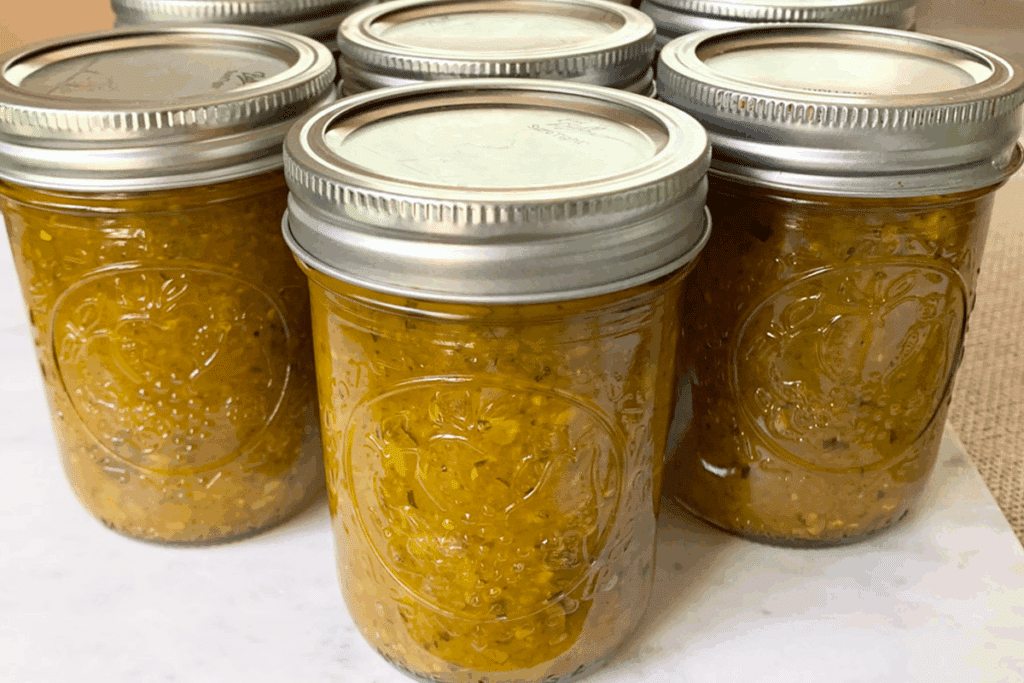
Grandma’s Old-Fashioned Zucchini Relish Canning Recipe is a delicious way to preserve your abundance of zucchini. This homemade relish is sweet, tangy, and full of flavor, and is the perfect condiment for burgers, hot dogs, sandwiches, and more. It is also delicious when mixed into chicken salad or tuna salad. This easy step-by-step guide on how to water-bath this delicious relish will have your pantry stocked for you and your family to enjoy all year long.

This post may contain affiliate links. Please read my disclosure policy for more information.
How I Discovered this Zucchini Relish Canning Recipe
A couple of summers ago, I was going through a box of my grandma’s recipes when I found this recipe for zucchini relish. I had recently learned the skill of canning, and I wanted to preserve some of the zucchini, onions, and peppers we picked from our garden. Although I wasn’t sure what zucchini relish would taste like, I had a ton of zucchini and thought I’d give it a try.
Believe it or not, this recipe is the best relish my husband and I have ever tasted. I have never been a huge fan of traditional pickle relish, but zucchini relish is different and off-the-charts delicious. My husband shared some of our jars of relish with friends and family, and everyone who tried it wanted more and begged for the recipe.
The Charm of Old-Fashioned Canning
In a world with so many modern conveniences, thinking of preserving your food can sound like a lot of work. However, when you take the time to can your own foods, you have a huge sense of accomplishment and satisfaction knowing you played a role in preserving what you eat. Additionally, when canning your food, it won’t have the added preservatives you find in store-bought varieties.
If you are just learning how to preserve food, this zucchini relish canning recipe is simple to make and a wonderful way to enjoy fresh garden vegetables all year long. Also, my guide to canning green beans the old-fashioned way is a great canning recipe for beginners and the perfect way to preserve summer-fresh food.
Pressure Canner vs. Water Bath Canner
For the most part, there are two main methods for preserving food: pressure canning and water bath canning. The determination is made regarding which method of canning is appropriate according to the acidity level of the food you are preserving. Additionally, if canning is not done correctly, there is an increased risk of foodborne botulism, which can be deadly.
According to the South Dakota State University Extension Office, “If you are canning a high-acid food, you will use the water bath canning method. If you are canning a low-acid food, you will use the pressure canning method. Acidity may be natural, as in most fruits, or added, as in pickled food. While low-acid canned foods contain too little acid to prevent the growth of C. botulinum, high-acid foods contain enough acid to block its growth or destroy them more rapidly when heated.”

Zucchini is considered a low-acid food, which would require pressure canning if canned alone. However, this Zucchini Relish Canning Recipe uses vinegar as part of the recipe, which will make the relish a high-acid food that can be preserved through the water bath method.
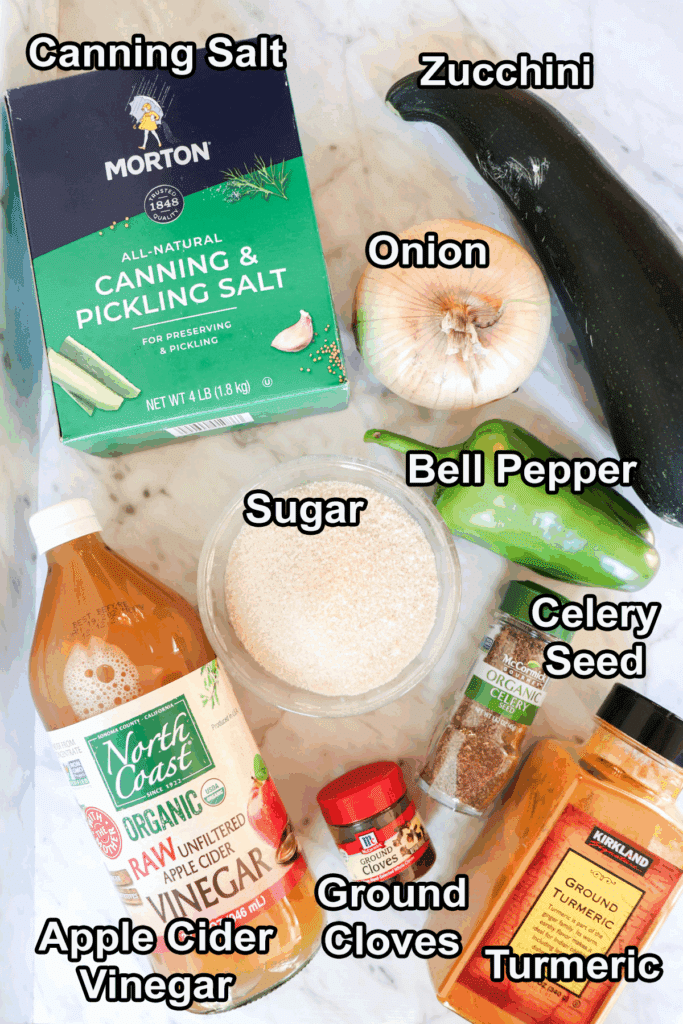
Ingredients for Zucchini Relish Canning Recipe
- Fresh Garden Zucchini
- Fresh Garden Onions
- Fresh Garden Peppers
- Canning salt
- Turmeric
- Ground Cloves
- Celery Seed
- Apple Cider Vinegar
- Sugar
- Water
Equipment for Zucchini Relish Canning Recipe
- Boiling water canner
- Half-pint canning jars with lids and bands
- Food processor (or knife and cutting board)
- Extra-large bowl
- Fine mesh strainer
- Large pot
- Small pot
- Ladle
- Jar lifter
- Tongs or magnetic lid lifter
- Canning funnel
- Paper towels
- Kitchen towels
- Timer
- Hot pads
- Cooling rack
Step-by-Step: How to CAN Zucchini Relish
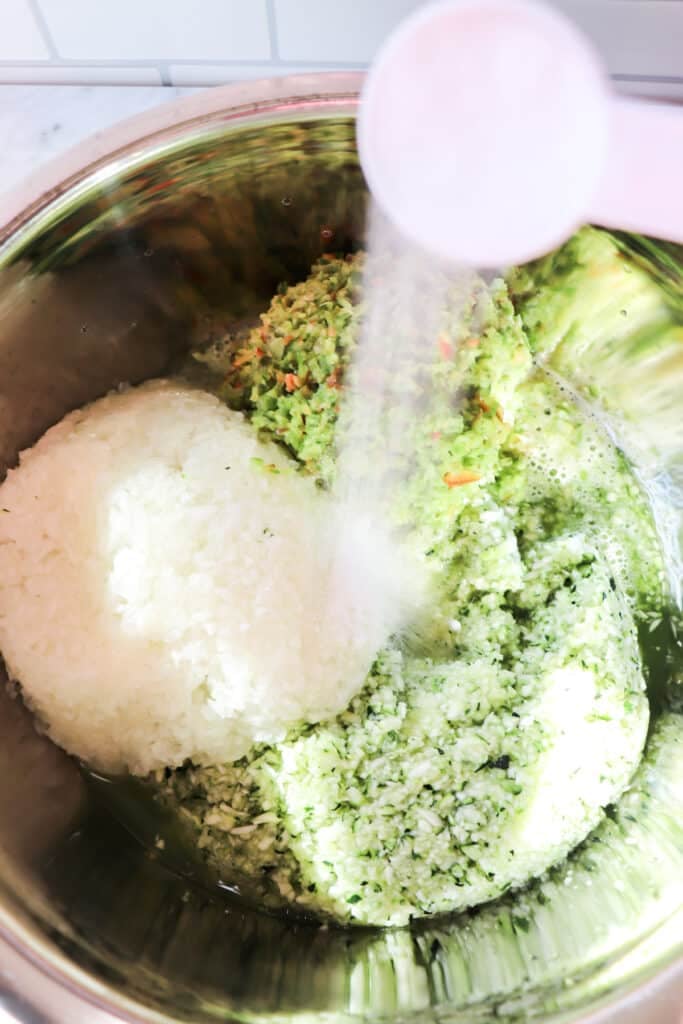
Chop and Salt the Vegetables: Finely chop the zucchini, onions, and peppers using a food processor or a knife and a cutting board. Combine the chopped vegetables in a large bowl, sprinkle with canning salt, then cover with water. Mix well, cover, and let stand at room temperature for 4 hours.
Here is how I use my food processor to chop the vegetables:
- Fill the processor bowl no more than half-full with chunks of one vegetable at a time. Measure out the vegetables after they have been finely chopped.
- Pulse 20 times, then scrape the sides.
- Pulse 10 times, then scrape the sides.
- Pulse 10 times, then scrape the sides.
- If needed, pulse 5 more times.


Drain and Rinse: Drain the zucchini mixture through the fine mesh strainer, pressing to remove as much liquid as possible. Rinse briefly with cold water and drain again thoroughly.


Cook the Relish: In a large stock pot, combine the rinsed vegetables, vinegar, sugar, and spices. Mix well and bring to a boil. Boil for 5-10 minutes, stirring occasionally.

Sterilize the Jars: Jars can be sterilized in a number of ways. I place my jars and rings in the dishwasher and run them through the sterilizing cycle. I pull the jars out of the dishwasher when the cycle is complete, and the jars are still hot.
Another method is to submerge the canning jars in a large pot of water and bring it to a gentle simmer for 10 minutes to sterilize them. Keep the jars in the hot water until ready to pack and fill them.
The jars can also be sterilized by boiling them or washing them in hot, soapy water and heating in a 200°F (93°C) oven. Keep them warm until you’re ready to fill them.
Prepare the Lids: In a small pot, bring water to a low simmer and place canning lids in the pot to sterilize. Keep the lids hot until ready to use.
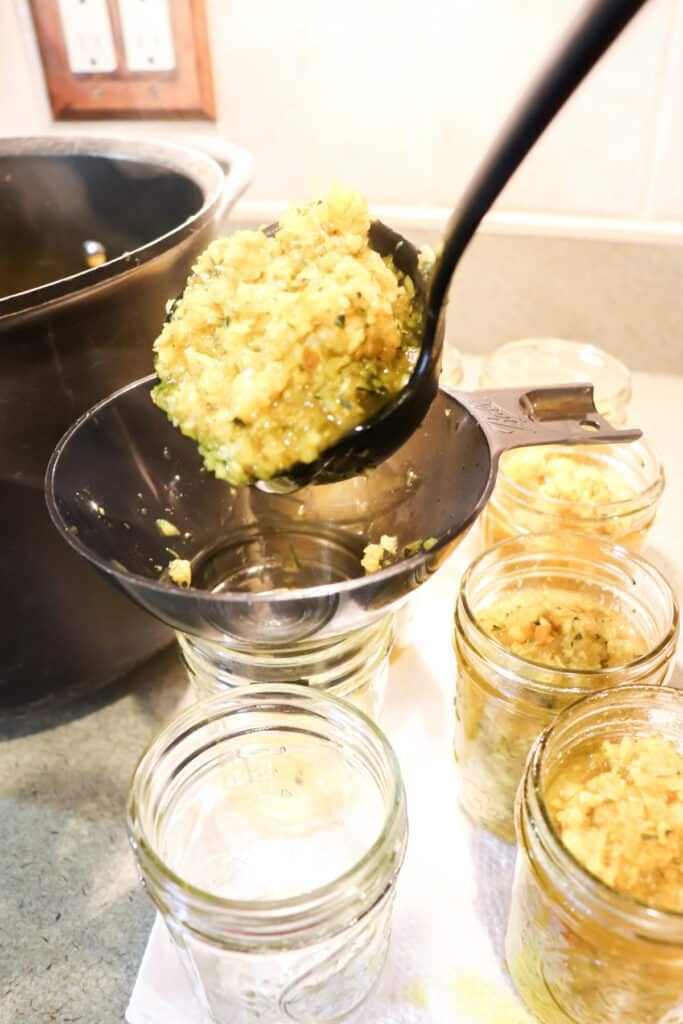
Pack and Seal: Using a funnel, ladle hot relish into the prepared jars, leaving one half-inch headspace. Remove air bubbles by gently running a bubble popper (also called a headspace tool) around the inside of the jars, helping to release any trapped air.
Wipe the rims of the jars clean, apply the lids, and screw on the bands until they are fingertip-tight.


Process in Water Bath: Place a trivet on the bottom of your hot-water bath canner, and, using the jar lifter, lower the jars into the pot. Make certain the water covers the jars by at least one inch. Over medium-high heat, bring the water to a rolling boil and process half-pint jars for 10 minutes (adjust for altitude if necessary) and pint jars for 15 minutes. After the jars have processed, turn off the heat and remove the lid from the pot. Let them sit for 5 minutes.
Remove the hot jars using jar tongs and place them on a cooling rack. Let them sit undisturbed for 24 hours and listen for the lids to pop.


Check seals: After the jars have cooled for 24 hours, press down on the center of the lids, ensuring they don’t flex up and down. Any unsealed jars should be refrigerated and consumed within a few weeks.
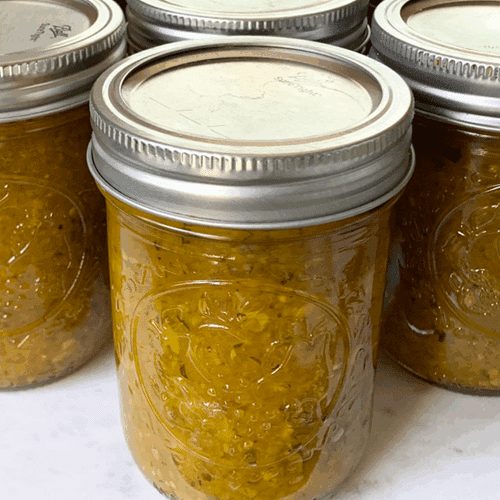
Store and enjoy: Label your sealed jars with the date and store jars in a cool, dark place. Allow them to sit for a few weeks before opening them.

Variations
- Spicy Zucchini Relish: Add chopped jalapeños, hot peppers, or red pepper flakes.
- Yellow Squash Swap: Substitute or mix with yellow squash.
- Type of Pepper: Use green, yellow, orange, or red bell peppers for color variation. If you don’t have enough bell peppers, feel free to use a variety of whatever you have on hand. I’ve used banana peppers, pepperoncinis, and serrano peppers if I haven’t had quite enough bell peppers.
- Vinegar: Use white vinegar instead of apple cider vinegar
FAQs about Canning Zucchini Relish
- Can I freeze zucchini relish instead of canning it?
While canning offers a longer shelf life, you can freeze cooled relish in airtight containers for up to 6 months.
- Is this relish recipe safe for water bath canning?
Yes. The high vinegar content ensures the acidity required for safe water-bath processing. Avoid altering the vinegar-to-vegetable ratio.
How to Serve this Zucchini Relish Canning Recipe
Part of the fun of preserving food is being able to enjoy it all year round. We love to enjoy our canned relish on hot dogs and brats or mixed into chicken salad, egg salad, potato salad, or tuna salad. Another thing I love to do is give my home-canned zucchini relish as a gift.

Enjoy Your Zucchini Relish
Whether you are a first-time canner or a seasoned home preserver, this zucchini relish canning recipe and my guide to canning green beans the old-fashioned way are great ways to preserve summer-fresh foods and keep alive long-lost traditions.
As you delve into the process, you’ll feel a connection to those who came before us, relying on these techniques to feed their families through the changing seasons. So, roll up your sleeves, embrace the nostalgia, and create jars of homemade zucchini relish that will transport you back to simpler times with every bite. Happy canning!
xoxo,
Molly
Grandma’s Old-Fashioned Zucchini Relish Canning Recipe
Ingredients
- 8 cups zucchini, chopped
- 4 cups onion, chopped
- 2 cups green bell peppers, chopped
- 4 tbsp. canning salt
- 2 1/2 cups apple cider vinegar
- 2 1/2 cups sugar
- 1 tbsp. turmeric
- 1/4 tsp. ground cloves
- 1 tsp. celery seed
- water
Instructions
- Chop and Salt the Vegetables: Finely chop the zucchini, onions, and peppers using a food processor or a knife and a cutting board. Combine the chopped vegetables in a large bowl, sprinkle with canning salt, then cover with water. Mix well, cover, and let stand at room temperature for 4 hours.
- Drain and Rinse: Drain the zucchini mixture through the fine mesh strainer, pressing to remove as much liquid as possible. Rinse briefly with cold water and drain again thoroughly.
- Cook the Relish: In a large stock pot, combine the rinsed vegetables, vinegar, sugar, and spices. Mix well and bring to a boil. Boil for 5-10 minutes, stirring occasionally.
- Sterilize the Jars: Jars can be sterilized in a number of ways. I place my jars and rings in the dishwasher and run them through the sterilizing cycle. I pull the jars out of the dishwasher when the cycle is complete, and the jars are still hot.Another method is to submerge the canning jars into a large pot of water and bring it to a gentle simmer for 10 minutes to sterilize them. Keep the jars in the hot water until ready to pack and fill them.The jars can also be sterilized by boiling them or washing them in hot, soapy water and heating in a 200°F (93°C) oven. Keep them warm until you're ready to fill them.
- Prepare the Lids: In a small pot, bring water to a low simmer and place canning lids in the pot to sterilize. Keep the lids hot until ready to use. Note: Always use new lids so the jars will seal properly.
- Pack and Seal: Using a funnel, ladle hot relish into the prepared jars, leaving one half inch headspace. Remove air bubbles by gently running a bubble popper (also called a headspace tool) around the inside of the jars, helping to release any trapped air.Wipe the rims of the jars clean, apply the lids, and screw on bands until fingertip-tight.
- Process in Water Bath: Place a trivet on the bottom of your hot water bath canner, and using the jar lifter, place the jars in the pot. Make certain the water covers the jars by at least one inch. Over medium-high heat, bring the water to a rolling boil and process half-pint jars for 10 minutes (adjust for altitude if necessary) and pint jars for 15 mintues. After the jars have processed, turn off the heat and remove the lid of the pot. Let them sit for 5 minutes.Remove the hot jars using jar tongs and place them on a cooling rack. Let them sit undisturbed for 24 hours and listen for the lids to pop.
- Check seals: After the jars have cooled for 24 hours, press down on the center of the lids, ensuring they don’t flex up and down. Any unsealed jars should be refrigerated and consumed within a few weeks.
- Store and enjoy: Label your sealed jars with the date and store jars in a cool, dark place. Allow them to sit for a few weeks before opening them.
Notes

 Bacon, Egg, and Cheese Biscuit Recipe
Leave a Reply